With each new season, Destiny 2 introduces new activities that have you teaming up with other Guardians to advance the story and fend off humanity’s enemies. The Season of the Lost introduces the new Astral Alignment activity, in which you fight to protect the Dreaming City’s Blind Well and use it to search through the Ascendant Plane for Mara Sov‘s missing Awoken allies.
The activity has a lot of parts and potential objectives, not all of which will appear in each run. It also is likely to change over time, so knowing how to handle it will help you excel–and earn new rewards. Here’s everything we know so far about the Astral Alignment activity and how to complete it.
Mara has more for you to do this season, as well. Check out our Tracing the Stars quest guide for more info on finding her Atlas Skews each week.
Join Astral Alignment From The Dreaming City Map
While the Override activity from the Season of the Splicer was accessed from the HELM in the Tower, you’ll jump into Astral Alignment activities from a new node located on the Dreaming City’s Director screen. Look for the icon on the right side. It’s a six-player activity you can take on with a fireteam, or jump into alone–matchmaking will find you a team to help you complete it, just like Override and other past seasonal activities.
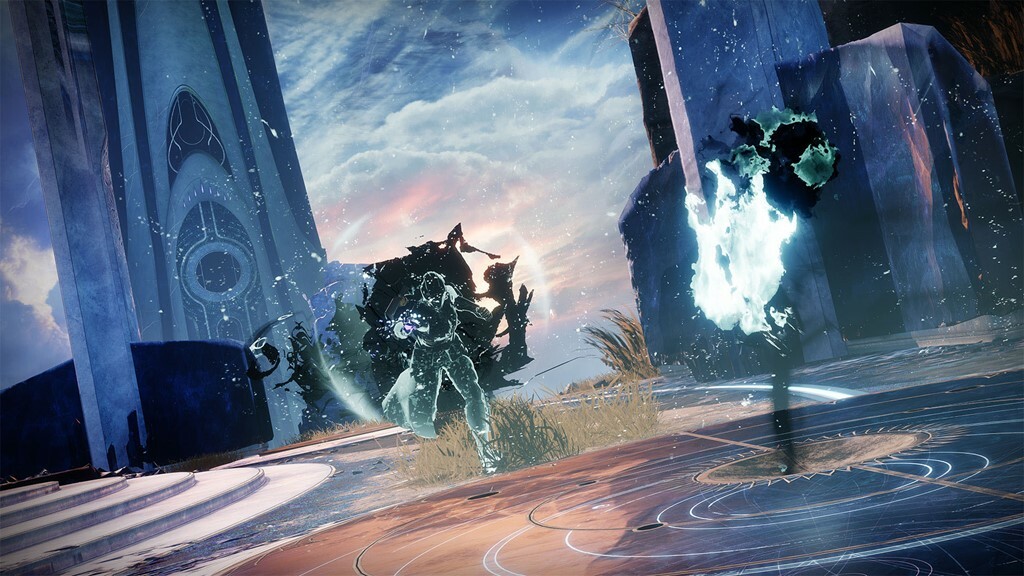
Defend The Blind Well

Your first task is to fight the enemies who flood the Blind Well in the Dreaming City. To start the activity, drop off your Wayfinder’s Compass at the center of the Blind Well.This is a pretty easy section, and you won’t have to kill many enemies to advance through it. Once you’ve knocked out enough invaders, you’ll be transported to one of several potential additional areas, where you’ll need to activate a nearby beacon and then stop the enemies there from disrupting the Ley Lines. We’ll run down how each objective works below.
Note that from here on out, you’ll also be dealing with champions, so make sure to bring the right mods to handle them.
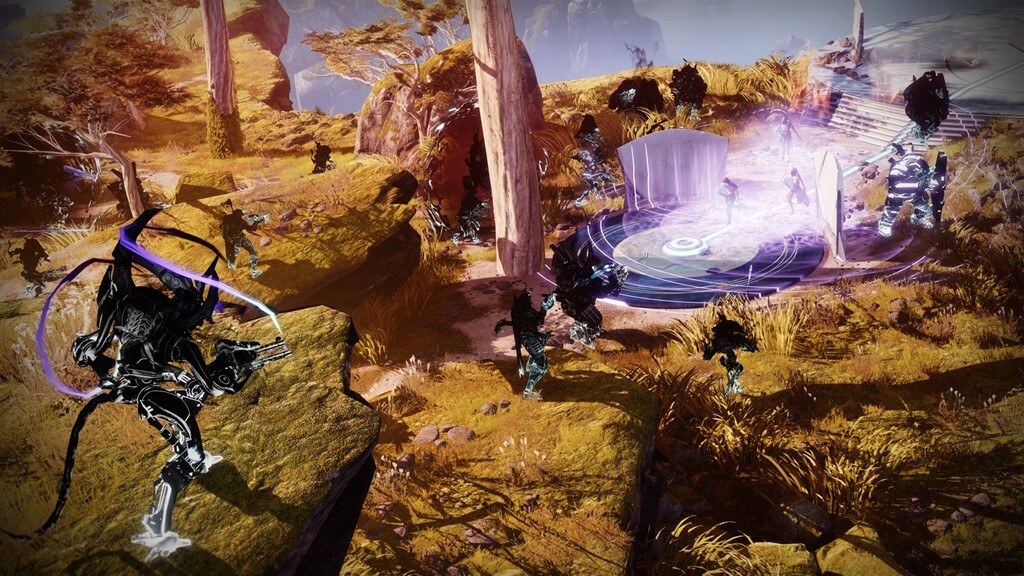
Disrupt The Taken Rifts
In your next battle, you’ll find yourself in an arena with several whirlwind-looking rifts of energy scattered around the arena. Your goal is to score points by “dunking” balls of energy in those rifts, thereby dispelling the Taken’s energy that’s bleeding into the Blind Well. To get those energy balls, you need to destroy specific Taken–the ones with the name “Eye of Xivu Arath.” Expect to be flooded with other enemies, so you won’t always want to sprint off toward the nearest Eye to kill it; it’s likely your team will benefit more from having most people mopping up enemies while only one or two people pursue the Eyes, in order to help keep everyone alive as much as possible.
The Eye of Xivu Arath enemies are Taken majors who aren’t too tough to bring down, but are usually flanked by a few minion enemies acting as bodyguards, and defended by snipers. Look for them on platforms on the outer edges of the arena. Kill an Eye and it’ll drop Taken Essence, a ball of energy you can pick up and carry to one of the rifts to dispel it. Keep repeating the process of clearing enemies, killing Eyes of Xivu Arath, dispelling rifts, and killing champions until you’ve earned enough progress to complete the arena and move on.
Stop The Dark Ether Harvest

This Scorn-centric objective has you stopping the undead Eliksni from poisoning the Blind Well with Dark Ether. To do that, you have to protect a few big Ether Harvesters scattered around the arena, stopping floating purple globs of ether from reaching them. You only have to defend one at a time, and it’ll be marked with a waypoint, so you should get an indication quickly of where you need to be. Note, however, that which harvester needs defending will constantly change, so you’ll have to reposition around the map.
Also scattered around the arena are dead Servitors, and every so often, you’ll see one blink and glow. This is an indication of where the Dark Ether will becoming from–after a few seconds, a bunch of purple Dark Ether will erupt from the blinking Servitor and float toward the harvester. By identifying which Servitor is about to spew ether, you can get ahead on your defensive efforts.
When the ether starts flying through the air, your job is to shoot it down before it reaches the Harvester. Each glob of ether you destroy gives your team a small amount of points, so you’ll just need to keep shooting ether down until you hit enough points to reach your objective. Note, of course, that a huge number of enemies will populate the area, so you’ll also need to defend yourself, clear out a bunch of Scorn, and defeat champions while you’re also keeping an eye on the Harvesters.
Charge The Batteries
Another Taken activity, this one sees you in a big arena with a couple of invulnerable Lost Knights that can hit you very hard. Your job in this one is to pick up three batteries and carry them across the arena to spots near where you spawn in, where you’ll “dunk” the batteries in order to break the Lost Knights’ shields. You’ll need three batteries per round.
The upshot of carrying the batteries is that you’ll get the buff Blessing of Sky, which will charge your abilities and Super very quickly. The downfall is that you’ll get the Encumbered debuff, which slows you down significantly. Encumbered is on a timer, and once that timer runs out, you’ll get a new debuff called Exhausted. This causes you to drop your battery–which is round and can roll away, potentially back down the hill you’re climbing–and prevents you from picking it or another one up until the timer runs out.
Thus, this one becomes a relay race, with three members of the team carrying batteries while the other three defend them. When each of the first three Guardians is Exhausted, the defenders should grab the batteries while the original battery carriers should start playing defense. Once you manage to get all three batteries to the dunk spots, the Lost Knights’ shields go down, giving you a chance to blast them to earn points. You should clear this objective after killing roughly two sets of Lost Knights.
Take Down The Boss

Once you’ve cleared two objectives beyond your first bout in the Blind Well, you’ll return to it for one last big boss fight. In this first week, you’ll face Kholks, a giant Taken Ogre. He’ll be flanked by a bunch of Taken enemies, including champions, so make sure you’re prepared for a fight.
After you deal some initial damage to Kholks, he’ll gain a new shield that makes him invulnerable. You’ll then need to dispel it with a special Taken weapon. Watch your screen for the words “A Taken Pylon has appeared” to pop up in the middle. When that happens, look around for a Taken Blight bubble. Head there and destroy the Blight, and a Taken elite enemy, like a Taken Captain, as well as a few smaller minions will appear where the Blight just was. Destroy the elite and it’ll drop another ball of Taken Essence.
Snag the Taken Essence and use it like a gun on Kholks. You’ll have a countdown of about 20 seconds dictating how much damage you can do with the Taken Essence weapon, so lay into the boss as fast as you can and as much as you can. This should knock down his shield, although you likely won’t be able to break it in one attack before your timer runs out.
Repeat the process to quickly identify a new Taken Pylon, destroy it, and gain another batch of Taken Essence. If you wait too long, Kholks’s shield will regenerate, so move fast or coordinate with your team so you can be ready to take down pylons as soon as they appear. When Kholks’s shield is broken, you can damage him as usual. Keep blasting the boss until it’s destroyed to earn two chests, just like in Override last season.
Parallax Trajectory – Season Of The Lost Currency
One chest in Astral Alignment is free, but the second, the Trove chest, requires a 150 Parallax Trajectory to open. You’ll earn this new currency in a variety of ways, specifically by fighting enemies in the Dreaming City, taking part in Astral Alignment and Shattered Realm activities, and completing Tracing the Stars missions. You can also get Parallax Trajectory from Gambit and Crucible missions, Strikes, and public events–essentially, just by playing the game.
There are also special objects you can locate in specific places each week, and in the Shattered Realm. These are Ascendant Anchors, and picking them up gives you a bit of a horde of Parallax Trajectory–30 in one shot, as opposed to the three you earn on occasion for killing enemies.
Parallax Trajectory is also what you’ll use to unlock new upgrades to the Wayfinder’s Compass in the HELM, so don’t go too wild spending it.
We’ll continue to update this guide as we learn more about Astral Alignment, take on new bosses, and uncover all there is to know about the new seasonal activity.
GameSpot may get a commission from retail offers.