“Do you think it’s cool to make people cry?” is what I came to Yoko Taro with when the interview started over our Zoom call. Of course, it was a cheeky way to let him know that the story of the recent reissue of Nier Replicant had me in my feelings. And with Yoko-san on the other end of the call as a virtual Kermit the Frog avatar that animated as he talked and gestured, how could we take things seriously? But he came back with an earnest answer.
“How should I put this…whenever a game comes out, the comments or the feedback that it receives is based not on the creator’s perspective, but how the players interpreted it. I don’t know if I’m able to say if that’s a good thing or not!”
As I got into my next question about building Nier’s sorrowful atmosphere, he prefaced by telling me, “Oh, I didn’t realize you were kind of joking with that first question. I should have given you a more fun answer to that!”
You kind of don’t know what you’re going to get out of an interview with him, which I’m also aware of from previous experience–he’s known for his eccentricity, earnestness, and curveballs despite his self-proclaimed aversion to interviews. So, what came out of our conversation wasn’t necessarily a deep-dive or critical analysis of Nier Replicant itself, but I think it was more indicative of where Yoko-san’s head is at–not just in that now-iconic Emil headpiece he wears at every public appearance. Well, I mean, he did get pretty contemplative about the reason he wears that, too.
Click To Unmute
Nier Replicant ver.1.2474487139 Review
Size:
Want us to remember this setting for all your devices?
Please use a html5 video capable browser to watch videos.
This video has an invalid file format.
This conversation with Yoko-san may or may not have diverged from the expected topics, but that’s kind of the fun in these sorts of things. The interview was conducted with Square Enix translator Aimi Tokutake, and the text has been edited for clarity and readability. (Note that there are some mild spoilers for Nier Replicant below.)
The Nier games have a very unique way of feeling sorrowful without being explicit or overbearing. Where does this come from? Is this a deliberate thing in their creation, and how do you approach creating worlds and stories like this?
The sorrowful themes in Nier aren’t necessarily the overarching themes per se, but it was very deliberate with Replicant, to make that sort of sorrowful game. That being said, what led to creating such a sad drama is the idea of wanting to make a more normal story. It wasn’t meant to be an especially sad story, but the previous series, Drakengard, was extremely graphic and extremely cruel. Compared to that, we wanted to reel it in a little bit, make it a bit more normal, so to speak.
But with Nier Replicant, it turned out to be sad. A lot of people had commented on how sorrowful it was. So with that, the next installment with Automata, we went for something that was a bit different and came from a different perspective. But in the end, people seem to have taken that as a sad, sorrowful story as well.
I’ve kind of realized my limitations as a creator. I feel like what I created had turned out to be sad again, and I don’t have much variation to offer. So, I am kind of reflecting back on that.
In Nier, it seems that no matter how much we try to preserve what we love, we act on instinct, and it can have dire unforeseen consequences. How do you reflect on this in the real world?
This is a really good question. And it’s wonderful that it prompted you to think in this way. I feel that it is yielding what I had hoped to achieve through this game.
In terms of how to think or what kind of thoughts went into these kinds of decisions, I think it all boils down to how the player interprets it as they play the game. I feel that the player is the one to make that decision on how they perceive the story.
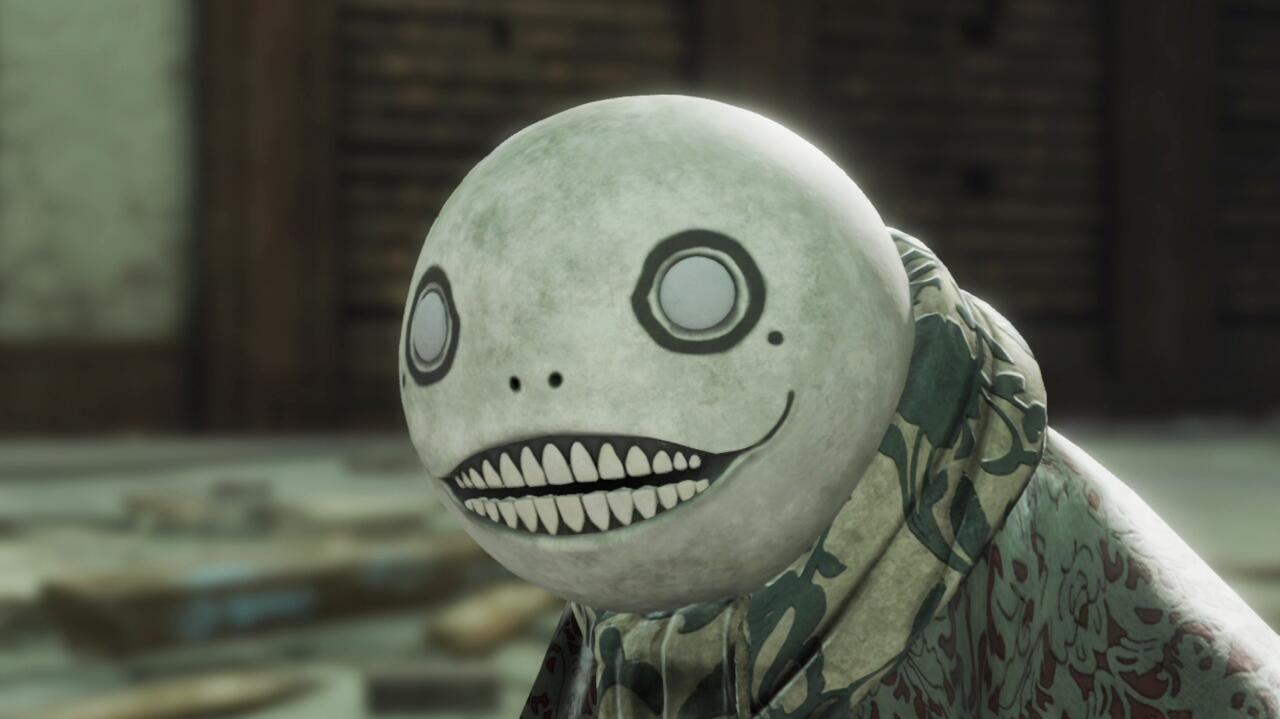
Emil has quickly become one of my favorite characters of all time. You wear the Emil headpiece everywhere you go, and it has become a sort of famous thing for you. But tell me, what does Emil mean to you?
First and foremost, the reason why I wear the Emil mask is because I actually don’t really like being out in public doing these interviews. And I had actually fought [Nier producer] Yosuke Saito over this. I really don’t want to be out doing these interviews, but he’s like, “No, you must be a spokesperson for these games.” We kind of argued about it, and I finally gave in and told him that, well, if I have a mask on, then I should be fine.
Of course, I don’t want to differentiate or give priority to certain media and neglect others. So while I don’t enjoy doing interviews, we also don’t want to neglect certain members of the media only because there may be of a smaller scale or something like that. But once I started appearing in these interviews, I would always have to go out in public, so I had more opportunities to have that mask on. It’s not like I preferred to wear the Emil mask in my interviews, I just have to wear it because I don’t want my face exposed.
Emil is the character from Nier Replicant who dons the headpiece that’s synonymous with the series and Yoko-san.
If I may digress a little bit, the reason why I don’t prefer to do interviews is because as a game creator, I believe that a game is something that everybody participates in. And the players and fans themselves should be given the opportunity to contemplate on what they play and imagine what their feelings are without the creators dictating it to them. The same goes for members of the media, too. I would love for members of the media to have the freedom to think about and speculate on what they have come in contact with in these games. By having an interview, they tend to see what the creator says as the correct answer. I don’t want to, sort of, shoehorn that kind of thinking.
We’ve diverged quite a bit, but going back to your initial question, what does Emil mean? To me, he’s quite convenient in terms of a character. Considering just how many thousands of years have passed since Replicant into Automata, most humans would have just perished and would no longer exist. So, just having Emil available, and Devola and Popola, as characters representing the Nier series was very helpful. I’m glad that Emil exists and what Emil came to be.
While Kainé’s story is extremely heartbreaking, she’s also one of the strongest characters. Between her distinct attitude, her expressive vulgarity, and being an intersex character, tell me about your perspective on Kainé.
I wanted to bring up recognizing her sex. Of course with Kainé–you can tell by her discussions with Weiss whenever they have their banter, he would make fun of her, but he recognizes she identifies herself as a woman. He never makes fun of her like, “Oh, you’re a man in women’s underwear,” and he will always respect that she identifies as a woman.
There was one thing that I was not able to do throughout the game, which is a romantic tension between Kainé and the protagonist. That was not depicted in the story, because, well, I feel that I don’t have the sensibilities to depict a drama that relates to a romantic relationship. At the same time, I don’t feel that there’s any connection like that even when I see it from a sort of third-party perspective.
Nier Replicant’s story is as much about Kainé as it is about anyone else.
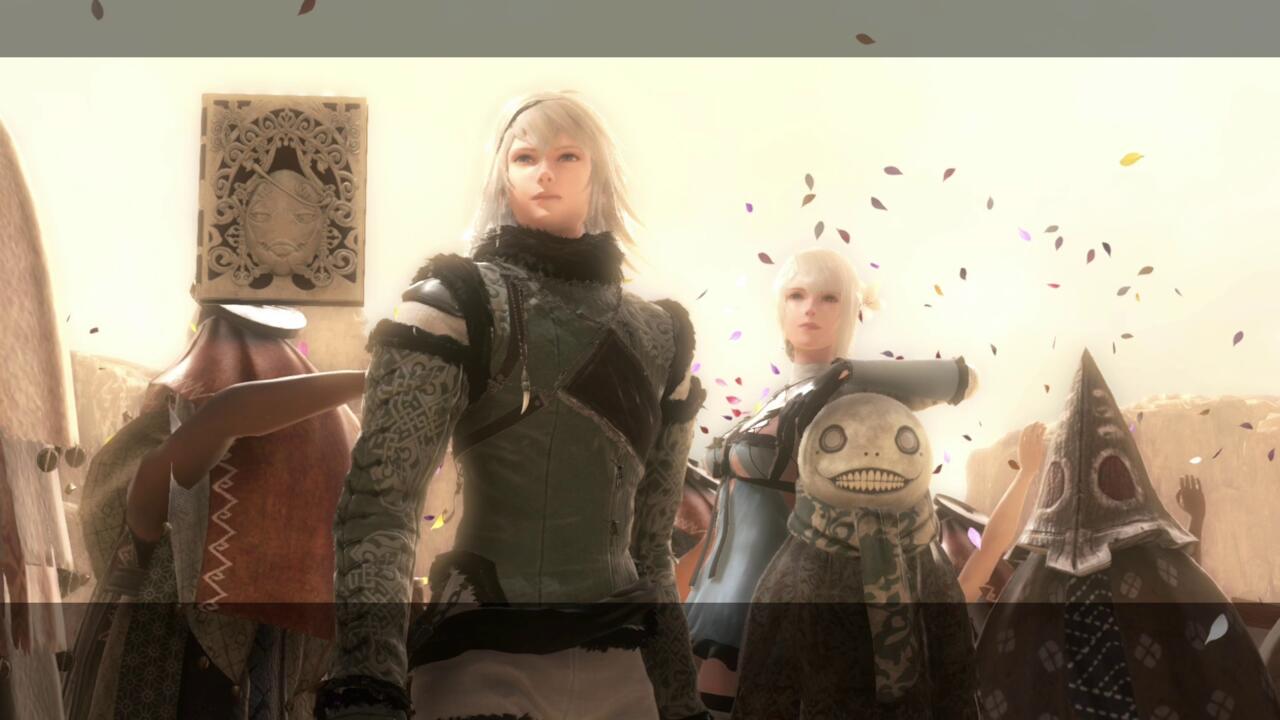
Considering that, the whole cast–Kainé, Emil, Grimoire Weiss, and the player or protagonist–is traveling together, forming bonds with each other, and wanting to be together. You’re fighting in a party, and you traverse the different areas together fairly frequently. So when thinking about it, I did want to depict their bond with each other, but how do I go about doing that? Why are they connected to each other? Well, I imagined that maybe it’s something very similar to that of a family. Maybe not exactly like a blood relative, so to speak, but some kind of friendship, family, or kinship to each other that doesn’t involve any sort of benefits, like monetary gain or a sexual desire, things like that. And it felt very good to depict that sort of platonic camaraderie amongst the members.
Tell me about the decision to go with Brother Nier instead of Father Nier. For you, how do you think it affects the storytelling dynamics?
I feel like there are several layers to this question, so let’s kind of break it down piece by piece. The reason why we chose to bring that perspective of Brother Nier as opposed to Father Nier–well, back when we were planning for the original Nier 11 years ago, we were actually advised by a marketing team member at Square Enix America that it’s better to have a more mature, adult character and it would be better received in the West to have a father protagonist. But once it was released, it didn’t do very well. So when we came back to the team, they were like, “Oh yeah, we did tell you that someone macho, like a father figure would be great, but you know, the Western fans of Square Enix games actually preferred a younger protagonist, maybe like a Cloud [from Final Fantasy 7].” I thought next time, I will make sure to have a younger protagonist. So, here we are with Brother Nier.
In terms of having two different perspectives of these protagonists and how it would affect the storytelling, I think that would depend on player interpretation. But what I have observed between Japan and the West, I do feel that the way adults are perceived is slightly different. The West tends to have like this clear borderline of “this is child, and this is adult.” You wouldn’t see an adult playing with a stuffed animal. They kind of graduate from being a child and into adulthood. Whereas Japan is more of a gradation where childish people are childish, no matter how old they are. And people with a wise old soul can be very young, but still very sage at the same time. So, I think there might be a cultural difference in how these things are interpreted.
Now from a creative standpoint, I figured it was just a matter of changing the perspective to a similar family member. I thought that I wouldn’t have to fix too many elements, but you open up the box and you realize there are a lot of things where you need to go in and change, so it was quite a challenge to get through that.
Despite the sorrowful atmosphere of Nier Replicant, it has its brief moments of joy.
Who’s your favorite character in Nier Replicant and why?
That would be Fyra from the Kingdom of Facade. The reason is that I was initially looking at Fyra and the King of Facade as the protagonist figures and writing a story around those two. But it turned out to be very sad and they both ended up dead in that story. I don’t think they were appropriate to have as our heroine and hero of the story. So they became sub-characters, but they are definitely something I remember very fondly.
Now that you mention it, what were your inspirations in creating a town like Facade? It has a very distinct place in Nier’s world with its culture, language, and rules.
The town of Facade is actually like a satire of Japan. I’m afraid I’m not sure about North American and European cultures, but in Japan, the rules are very strict. People are very careful about manners and making sure that they’re watching each other closely and making sure those rules are being upheld. They’re very conscious about following the rules. Like being tardy, that’s a bad thing. If trains are delayed, it’s a big issue, things like that. They’re just so rigid and stiff. There’s this sort of unspoken understanding that everything must be followed. Having that as my basis, take that hundreds or a thousand years in the future, what does that concept look like where they must follow the rules and if that’s all that remained in their culture?
That being said, I don’t want to make it seem like they’re unhappy that they’re so restricted in their rules. The point of it is for them to have meaning. This is the environment that they’re in, but what do they make out of this? If you take a closer look at the people of Facade, you do see that they are enjoying their life. For example, Fyra and the King fall in love with each other, then they have a relationship and whatnot.
The Kingdom of Facade has a tragic, complicated history.
How have your views or perceptions of Nier Replicant changed over its 11 year history, especially in contrast to Automata’s success?
The impression I got, especially because we made Automata such a success and how much Replicant has changed…first of all, my income has increased. And nowadays the people around me, namely people that I work with at Square Enix, now have a much more open attitude to some of the feedback that I provide. Before, we didn’t sell our games very well, so nobody really listened to me. But now it’s like, if I don’t like the design on a certain merchandise item, now they listen to me. So I’m happy about that.
Not to get into spoiler specifics, tell me about how and why you created Ending E for Replicant? What was your goal in doing so?
Initially–this is with the original Nier 11 years ago–we wanted to add an element of surprise. Like, what if the ending wasn’t even part of the game? That was the initial thinking behind having that sort of ending written in one of the lore books that we published for Nier. We’ve already shown that trick, so it would have been weird to do it again with the new updated version in Replicant. I figured that I need to do something different. So I was able to incorporate it into the base game itself. The reason why I was able to get that idea through was because we had enough budget. Thank you to Square Enix. With Automata being such a hit, we now had a sufficient budget to add Ending E.
With Ending E, trying to incorporate it into the realm of Replicant required thinking about incorporating elements of technology.Considering how when you go far into the future, and advanced technology is now being integrated, I wanted to depict how that would affect the different characters in the story. The concept behind it was very similar to how whenever there’s like a medieval fantasy story where somebody performs magic, but it’s actually a display of technology. That was kind of the vibe I was going for with that ending.
2B versus Kainé, who wins?
Since you’re the one asking the question, if we pit 2B and Kainé against each other, Kainé is going to come after you, Michael. And she’s going to kill you, so you won’t know what happens.
Would Weiss make a good cookbook?
I don’t think he’d make a very good cookbook. Perhaps he’d just be like, here’s how to pour milk with cereal.
If you could live anywhere in Nier, where would it be and why?
To be quite honest with you, I don’t think I’d want to live anywhere in the world of Nier because there are no convenience stores. You go everywhere and they make you do fetch quests. I don’t know if I want to live there.
That being said, I think maybe the Seafront. You know, lounge around at one of the bars, that might be nice.
Where do you see the Nier franchise going from here? Is Drakengard still in the picture?
I don’t really have any sort of attachment to a particular IP. So, if Square Enix has the desire to expand upon the franchise, I’m willing to support them wherever. On the flip side, I don’t have any sort of negative feelings or feeling of rejection towards any of the IPs anyway. The reason I feel this way is because I’ve always sort of been a subcontractor where the direction comes in and I would create. I think that I work best when there is some kind of theme or subject to work off of. I mean, it might be challenging if I’m told I have the freedom to go wherever–I would probably not know where to go. It’s better that I kind of stand by and wait for Square Enix’s next command.
That being said, whenever I am asked about whether I want to continue working on Nier or go back to Drakengard… producer Yosuke Saito and I are about 50 years old now! We are getting old and our health might not be all there at this point. So, I wonder, maybe one of us might die one of these days and the franchise might go down with it.
You do have Nier Reincarnation coming up. What can you tell me about its place in the Nier universe and what kinds of story threads we can expect?
In terms of where Reincarnation fits into the universe, it’s not revealed yet. So, unfortunately I’m not able to disclose at this point. That being said, we don’t want this game to end its service prematurely and then we never find out. That will very much depend on the players. So please, I hope players get this game in their hands.
On the question about what can we expect something that I’m very uncomfortable with because I, I don’t want people to have their hopes on me! I’m not the type of person who responds to expectations. If anything, I think it would be best to expect that I will provide the unexpected. I will do something that’s unexpected, yeah, I will work hard towards that.
Content warning:This article discusses subject matter pertaining to mental health including anxiety, depression, and self-harm.
At the almost-exact midpoint of Final Fantasy 6, the classic 1994 RPG from Squaresoft, the power-hungry Gestahl Empire has raised the Floating Continent, where it intends to use a powerful magical field to consolidate its power and rule the world. At this point, what had been a familiar “evil empire versus scrappy rebellion” story takes a turn, as one of the Empire’s lieutenants, Kefka, overthrows his emperor and intentionally throws the magical field out of balance, ushering in worldwide darkness and destruction. There is no master plan at play here. Kefka is pure nihilistic glee, destruction for the sake of destruction. When he emerges as the game’s primary antagonist, it’s no longer an evil empire but sheer wanton devastation you’re fighting against. At this point in the game, death and destruction wins.
Today, we know how that feels. Death won here in our world too, at least for a while.
A New York Times data project from June 2020 called How the Virus Won showed in excruciating detail the way the COVID-19 pandemic manifested and spread throughout the population, largely unchecked in the United States, catching political and scientific leaders flatfooted until it was too late. As of the time of publishing last June, approximately 480,000 people had died worldwide. Currently, that figure is well over 3 million.
New York Times “How the Virus Won” Data Project, showing travel volume from March 1-14, 2020
This has been one of the bleakest periods in modern history. Millions of people have lost their lives, and many millions more have lost loved ones or friends or coworkers. An economic collapse has cost people their livelihoods. The mitigation measures that have suppressed the virus have had their own unintended side-effects, like loneliness, depression, and exhaustion. Remote work for those who can perform their jobs has been an overwhelming challenge for single people and families alike, who increasingly find the lines between work and home life blurred.
There’s also a sense of trepidation that the world we’re about to re-enter is going to look different, feel different, than the one we left
The world is starting to heal now. Vaccines are starting to become more widespread and accessible among the larger population in many countries. There’s a sense of collective relief as people celebrate their immunizations and make plans to socialize and visit family. But there’s also a sense of trepidation that the world we’re about to re-enter is going to look different, feel different, than the one we left in March 2020. For those prone to anxiety–and who isn’t, after what we’ve all been through–it can feel intimidating.
I believe in the power of art to help us understand the human condition and how to engage with the world. I care about video games because, aside from providing a satisfying distraction like any other hobby, they have power to make us active participants in storytelling and foster a connection with the subject matter and characters in a way few other mediums can. And so as hokey as it may seem, I find it comforting to look back on Final Fantasy 6 and how it portrayed the second half–the World of Ruin–and how its characters learned to re-engage with a broken world.
When the World of Ruin segment begins, the game subtly shifts our perspective. Its first act in the World of Balance opens with Terra, the half-magic being enslaved by the Empire. This cues the audience into associating with Terra, the game’s main protagonist even among its ensemble cast. She is central to the events of the world, tied to both the magical Espers and the evil Gestahlian Empire. Following her story is the path through which we understand the world and its events. The game features more than a dozen playable characters, but for the first half, Terra is the one person whose eyes we’re really meant to see through. Everything is framed around her.
Kefka illustrated by Yoshitaka Amano
When the second act begins, it no longer stars Terra. The perspective shifts to Celes–an important character, but no more so than many of the other members of the ensemble, like Locke or Sabin. This partially closes the book on the centrality of Terra’s story. She represented the conflict between a magical race chased underground and those hellbent on exploiting their power. We essentially already know everything we need to know about Espers, and the Empire no longer even exists. Kefka used his position in the organization to decimate the world.
Celes, then, represents a new lens through which to see the world. She’s a former Imperial officer herself, who became disillusioned with the Empire’s methods long before Kefka’s nihilistic heel-turn. She wasn’t an oppressed figure breaking free from her constraints, she was an oppressor looking for redemption. She worked right alongside Kefka, in fact.
She wakes up in the World of Ruin, nearly alone in a desolate landscape. Her one companion is Cid, another former Imperial and the creator of the powerful Magitek armor that helped the organization put its boot to the neck of several kingdoms. He explains that it had been a year since the cataclysm and that others on their small island had either passed away or thrown themselves from the cliffs in despair. Celes and Cid are the only ones left.
These two, who both must be carrying around guilt for helping build the Empire that brought Kefka to power, rely on each other. Cid provides companionship and support, and Celes is tasked with catching fish to nurse him back to health. The game briefly becomes routine and monotonous as the pair focus on survival, and they form a de facto family unit to the exclusion of contact with any other humans. Celes even takes to calling Cid “grandfather.”
If you catch bad fish, Cid can pass away as well, leaving Celes completely alone. In this version of events, she even attempts self-harm by throwing herself off the cliff, just like the other despondent survivors Cid told her about. But whether he lives or dies, in-person or via a posthumous letter, Cid gives her a raft–the key to emerging from her accidental exile and reconnecting with the world.
The game briefly becomes routine and monotonous as the pair focus on survival, and they form a de facto family unit to the exclusion of contact with any other humans.
From there, the game becomes much more open than it had been in the World of Balance. You travel the world seeking out your companions, but many of them are optional. Terra is especially resistant to rejoin the cause, having found a new purpose taking care of orphaned children. But this is also the game at its most hopeful, as you progressively rediscover all of your party members in this new context. Each of them has found a new reason for living or something to strive for in this broken world, and each can join, however reluctantly, to protect the new lives they’ve built for themselves.
This context makes the final confrontation against Kefka that much more significant. The villain, having ascended to god-like status from magical energy, is downright jubilant in having taken so many and destroyed so much. This is where Final Fantasy 6 reaches its emotional climax, in a moment that may seem maudlin but in-context feels entirely earned:
Party Member: People will keep rebuilding the things you take from them!
Kefka: Then I’ll destroy those too. Why do people rebuild things they know are going to be destroyed? Why do people cling to life when they know they can’t live forever? Think how meaningless each of your lives is!
Party Member: It’s not the net result of one’s life that’s important! It’s the day-to-day concerns, the personal victories, and the celebration of life…and love!
Party Member: It’s enough if people are able to experience the joy that each day can bring!
Kefka: And have you found your joy, in this nearly dead world of ours?
Kefka isn’t really asking. He’s taunting them, along with the very idea that they could possibly find purpose in the corrupted world he’s made. But one by one, each party member you’ve recruited answers. They’ve each found their own joy in the broken world, and they resolutely tell Kefka they won’t allow him to harm another living thing. A final battle ensues, the villain is ultimately defeated, the heroes are triumphant.
But the world remains destroyed. There is no magical wish for everything to be as it was. The World of Ruin isn’t converted back to its former lushness. The landscape is still brown and desolate. Vegetation is sparse. Lands are still swallowed by water.
Those who died are still gone.
And that’s as it should be. Final Fantasy 6 isn’t a game about a band of heroes who solve the world’s problems and set everything right. It’s about emerging from lonely isolation with a renewed sense of purpose, engaging with society on its own terms, and accepting that some crises are too big to reverse. It’s about finding joy and hope and meaning in a broken world. It’s about the resilience of humanity to keep rebuilding what is taken from them. As we start to emerge from our own islands, this quarter-century-old game can help to inspire us to do the same.
There are certainly a lot of games coming out at the moment, but if you want to spend less money–or no money at all–then GOG has you covered. The brawler Tonight We Riot is currently completely free on the service, though you need to act quickly before the deal has expired.
Rather than go to the game’s listing to claim this deal, you need to go to the main GOG page, scroll down to the banner with game near the top, and click on it after you’ve signed into your account. You’ll see a message saying the game is being added to your account, and that’s all there is to it. You must claim the game before May 2 at 6 AM PT / 9 AM ET.
GOG lets you play DRM-free versions of games, meaning you can install them on your PC without needing online validation to confirm ownership while you’re playing. This lets you play the games offline, for one thing, but it also eliminates the use of software that can sometimes affect a game’s performance. Tonight We Riot can also practically run on a toaster and is available across PC and Mac, so there’s really no harm in claiming it for free now.
Tonight We Riot is typically $15, and the game isn’t that old. It only released about a year ago, and it combines classic brawling and a retro-inspired art style with a dystopic, revolutionary setting. Keeping with the game’s political themes, studio Pixel Pushers Union 512 is a worker-owned cooperative. Its employees can say proudly that they have something in common with juice giants Welch’s and Ocean Spray.
Jonathan Ferguson, a weapons expert and Keeper of Firearms & Artillery at the Royal Armouries, breaks down the weaponry of Fallout: New Vegas, including the franchise’s iconic Nuka Launcher, the cumbersome Minigun, and the Gauss Rifle.
Games Done Quick will see the return of its all-women speedrunning event Flame Fatales this August, and players interested in participating will be able to send their game submissions in just a few weeks. Running for a week, the event will be held completely online and, as with all GDQ events, will help raise money for charity via viewers’ donations.
Flame Fatales begins on August 15 and runs through August 21, with game submissions opening up on May 18. If you aren’t sure whether you want to volunteer you’ll have a little longer to decide, as those submissions won’t go live until July 15, which is the same day the schedule releases.
The last Flame Fatales was held in Fall 2020 and raised over $80,000 for the Malala Fund, which supports girls’ education worldwide. The charity for this year’s event has not been announced yet. The main Games Done Quick events typically donate money toward medical-related charities.
The winter edition, Awesome Games Done Quick, has donated to the Prevent Cancer Foundation since 2011, while the Summer Games Done Quick event has raised money for Doctors Without Borders. For the last several years, these events have managed to raise a few million dollars each time, capping out at more than $3.1 million in January 2020. Summer Games Done Quick 2021, the next main event, will be held online this year.
The speedrunning organization has seen some of the best players in the world attempt to race through various games–some of which don’t seem like obvious choices–and sometimes the players compete against others for the fastest time. Viewers can also unlock bonus games or make some of the in-game choices if they meet donation thresholds.
Extended progression issues related to the new Call of Duty: Warzone mission Hunt for Adler kept players from enjoying the Black Ops Cold War-themed content, and Raven Software is offering an apology gift. Anyone who logs into the game before the end of Season 3 will get a free Adler “Tortured & Rescued” skin.
Raven Software made the announcement late on April 30, thanking players for being patient regarding the issues and for participating in the limited-time event.
Starting right now and until the end of Season Three, anyone who logs into #Warzone will be granted the ‘Tortured & Rescued’ Adler Skin. We’d like to thank everyone for participating in the Hunt for Adler limited time event and for being patient these past few days. 🎉 https://t.co/c4PlhB6qbx
Those problems had included progression not being tracked while trying to complete the event, as well as intel players needed to get being located beyond where they could actually go in the game. The mission began following a massive event to kick off the season, which included a nuclear bomb being dropped on Verdansk. For some reason, it turned back the hand of time and transported everyone to 1984.
This served as the introduction for Black Ops Cold War’s characters and plot threads to come into Call of Duty: Warzone, largely taking over for the Modern Warfare content that had been in the game already. Because Activision is using Warzone as its ongoing Call of Duty battle royale game instead of changing it from year to year, we’re likely going to see similar transitions in the future.
Adler was one of the new characters introduced in Call of Duty: Black Ops Cold War, playing a key role in the game’s twist-filled story. He was joined by returning characters such as Jason Hudson and Frank Woods.
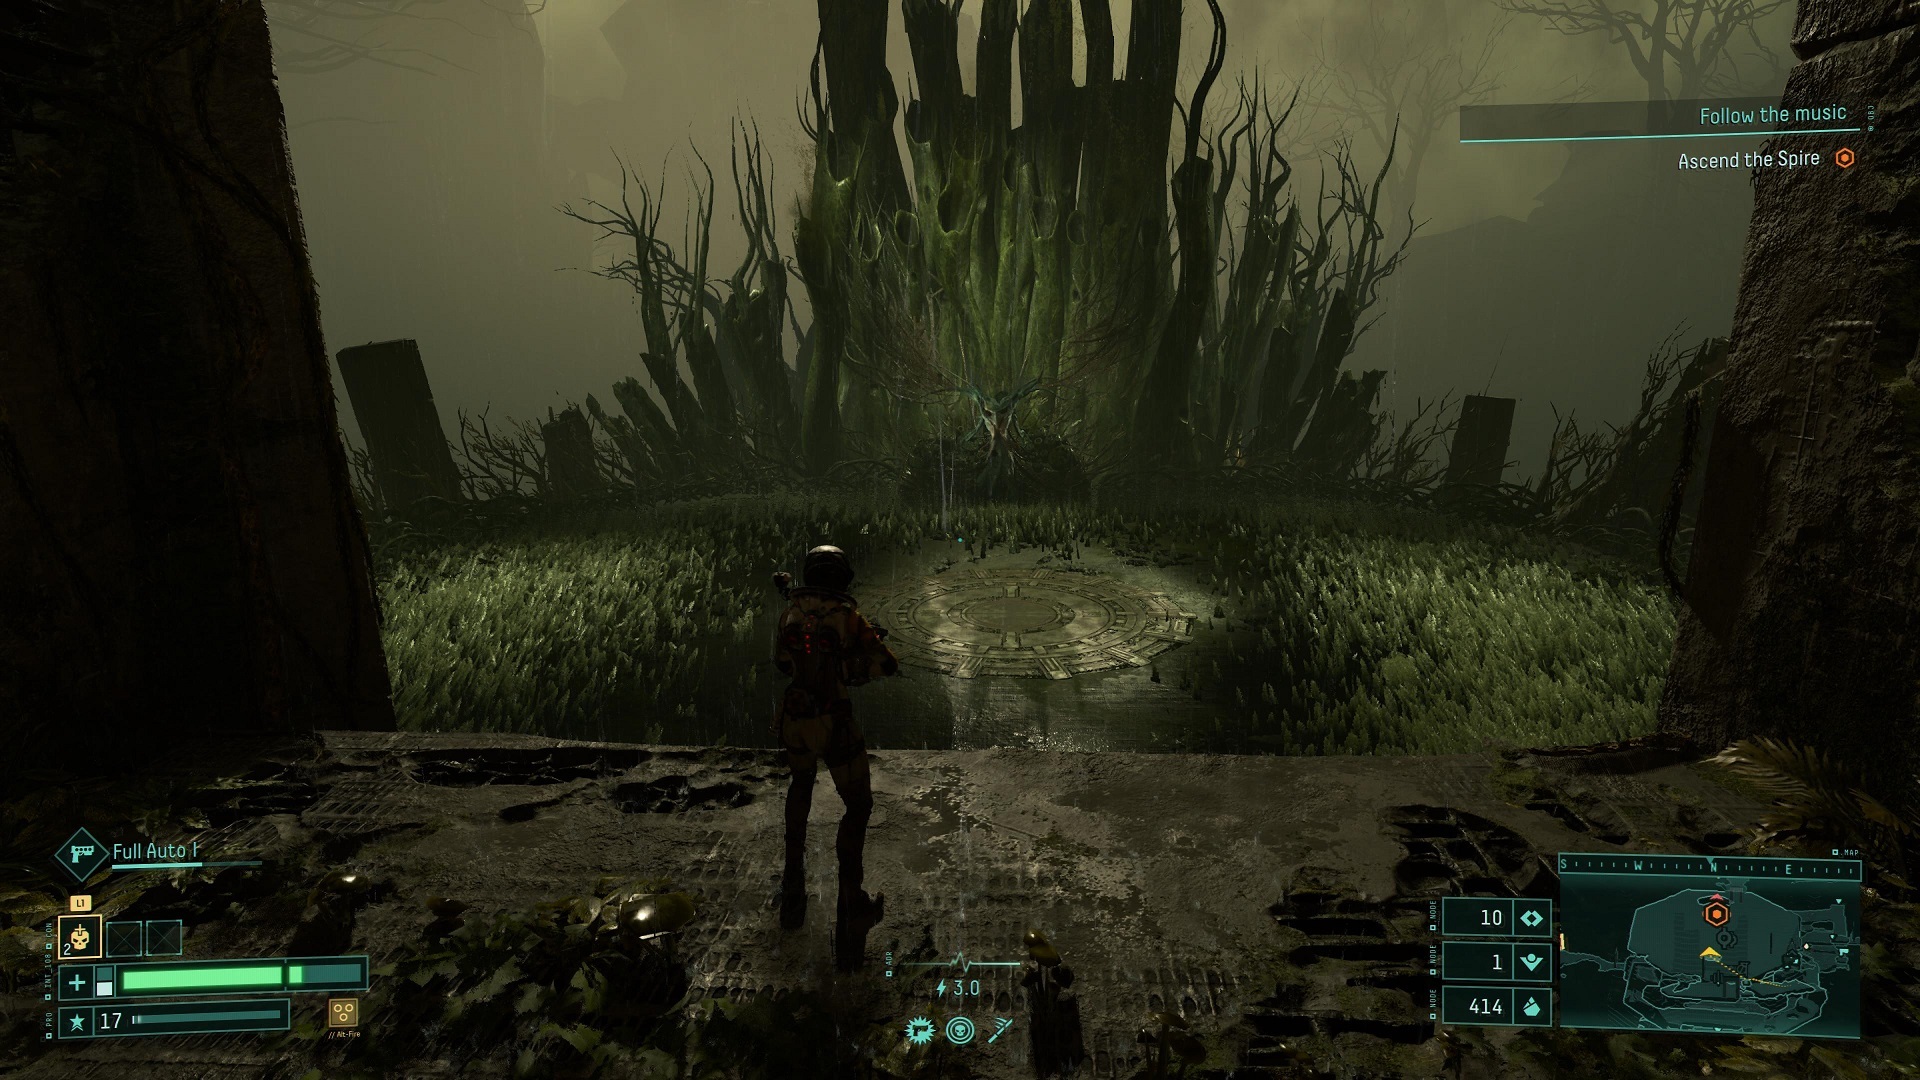
Note: This guide contains spoilers for all of Returnal‘s bosses, and the game is best enjoyed by experiencing it for yourself without any prior knowledge. We recommend going in blind, but if you still need help, read on.
Bullet-hell roguelike Returnal will put you through your paces with its fast-paced battles, and that’s never more true than against its tough, powerful boss characters. You’ll find a boss at the end of just about every biome and they’ll challenge you to utilize all your skills, weapons, and consumables to defeat them.
However, if you know what to expect from each boss, and can read their moves, it’s more than possible to defeat them–sometimes without even taking a hit. The key is to watch their moves, anticipate their actions, and avoid their attacks. We’ve powered through every boss in Returnal to help you master each one. Below, you’ll find all the info and strategies you need to defeat Returnal’s toughest challenges, find the White Shadow, and uncover the mysteries of Atropos and its eternal cycle. Here’s everything you need to know to beat Returnal’s bosses.
First and foremost, you’ll want to prep for every boss fight well before you take it on. You’ll usually need to unlock the boss chamber as you work through each new biome, but once you’ve opened it, it’ll stay open–you can just sprint straight to the boss on later runs. It’s always a good idea to find as much Silphium Resin as you can to increase your health before a boss fight, and to bring a hard-hitting gun with you as well. It’s a good idea to prioritize having a gun you like and are comfortable with over one with the highest stats you can find, however. These boss fights are battles of attrition where sustained damage is the most important thing, so bring something you can use well to do a lot of damage quickly.
You should also try to find and power a Recombinator in the biome you’re exploring. These are the large, round machines with an indentation of an alien body inside. You’ll need six Ether to run them, so make sure you’ve stockpiled some. A Recombinator will give you an extra life should you die, so you’ll have a second shot at the boss.
In addition to the Recombinator, prioritize a few key artifacts and items to bring with you. If you can find one, the Astronaut Figure and Child’s Watch artifacts are great; they’ll instantly bring you back to life mid-fight if you die, which is even better than the Recombinator, since you won’t have to restart the fight from the beginning. Other key items are Large Silphium Vials, which can heal you in a pinch, and Damage Siphons, which allow you to convert the damage you do to the boss into health for yourself. Other than that, bring the items you like and which are good for defense, such as Shield Vials.
Phrike
Phase 1
Phrike is pretty easy to deal with for the first phase of the fight, especially if you stay well away from it. The boss tends to stand very still and fire off blasts of shots that you can avoid mostly by strafing left and right, and dodging only if you really need to. Pay attention to how many of its hands are glowing, as this will dictate what’s coming your way. Be most careful of the big blasts of blue rockets fires from all three hands; these fast projectiles will arc up into the air and coalesce on your position, and they have tracking, so you’ll want to sprint or dash to build enough speed to get away. It’ll also fire off plumes of purple shots into the air with two hands, which will drift down slowly, but while these seem like they’ll be problematic, you can generally just ignore them–they tend to scatter so much that you can avoid them easily.
When Phrike isn’t just blasting umbrellas of attacks at you, it’ll aim more pointed bursts of orange bullets your way with one hand. These, too, are fairly easily avoided by strafing, but they come fast and it’ll try to lead you with them. If you stay back, you can stand still and gauge which way you need to move to avoid them pretty easily.
Phrike will draw energy into its chest for a quick, vertical laser beam blast from its eyes that arcs forward, burning the ground straight in front of the boss. When you see this, dash fast to one side; it’s easy to get clear of, but it hurts a lot if you’re caught in it.
Every so often, Phrike will disappear and move to a new location in the room; you can anticipate this by watching for an orange glow on the ground, which shows its movement and where it’ll come up next. Move away from where it’s headed so you can be ready for its next attack.
Phase 2
When you get Phrike to its second phase, the boss will add two attacks you need to watch out for most: a blast toward the floor that releases a radial wave of energy you must jump over or dash through; and a melee attack in which it’ll dash toward you to slap you with its arm. These two attacks come together, with the boss starting the wave and then coming after you itself when you’re distracted. First, stay back so you have ample time to deal with the wave, then wait for Phrike to come at you and dash away, being sure to hold down the dash button so you get the full distance. You’ll then probably need to hop to dodge the wave, but it’s slow and easily timed. Another way to handle this attack is to jump and dash toward the blast wave when Phrike comes at you, effectively dodging both moves at once, but the distance on this can be tough to judge depending on your location in the room.
You’ll also see the boss now using its disappearing fog trick to close the distance on you for a melee strike. Keep an eye on it when it goes to ground, and be prepared to dash.
Less often, Phrike will do its eye beam attack, but horizontally, rather than vertically. You can jump this, but it’s more reliable to dash through it to avoid the hit. It comes very fast, so be ready to dash toward the beam as soon as you see the boss readying this one.
Phase 3
Its final bag of tricks, several of Phrike’s attacks become twice as dangerous. It’ll continue to do the melee dash, but now, it’ll often add a second dash to the mix, right after the first, requiring two dashes. There’s a slight delay between the two attacks, so keep the camera angled toward Phrike so you can see it coming. When Phrike does its downward blast attack, you’ll have two slow-moving waves coming at you, plus its melee attacks. The best way to handle this is to jump and dash so that you can avoid the melee strike and get yourself in the air to land clear of the slower waves.
The same is now true of its sweeping horizontal eye beam attack–it’ll swing it across the room in one direction, and then after a second, back across in the other direction. Again, keep an eye on the boss and be ready to make a second dash opposite the first. You still want to dash through the beams or jump over them.
Phrike also inverts the combination of purple bullets and blue rockets–it’ll now spray purple bullets downward, sending them out in a spiral moving across the ground, while shooting rockets at you in the air. The rockets remain top priority because they’re fast, but you’ll have to watch where you move on the ground. The purple bullets are spacey but numerous, so you can slip between them, but be careful you don’t catch one while distracted.
Keep your head on a swivel and avoid getting overwhelmed during this phase and you can take down Phrike with sustained fire. It won’t require too much damage, but you’ll have to be careful especially of its melee attack–that second one can be a doozy because of the delayed timing.
Ixion
Phase 1
The boss of the Crimson Wastes flies, which can make dealing with it a bit tougher as it mixes aerial strikes and ground strikes. However, the boss’s head is a big weakness, and if you can sustain fire on it, you can stagger it and knock it out of attack animations when you do enough damage. That’s a big part of this fight: Keep hitting Ixion in the head and it’ll stop fighting for a second, giving you a chance to hit it even harder.
In the first phase, Ixion will try to hit you with a series of inaccurate bursts of bullets. It’ll shoot a heap of blue bullets straight at you that are easily dodged, and when it dashes to a new location, it’ll release a blast of orange bullets that just spread out in all directions and can be mostly ignored if you’re not close to them. Watch out for Ixion to charge up and fire a cone of blue bullets straight at you, though–you’ll need to move quickly sideways to get out of the range of fire.
Keep hitting Ixion in the head, though, especially with a powerful gun, and you can stagger it out of several attack animations. Do that, and you might be able to render this first phase mostly trivial.
Phase 2
Here’s where things get tougher. Ixion will shoot up into the air and then land in the center of the arena–stay well back. Waves of fire will then start to emanate out from the boss, which are a pain to deal with. You’ve first got a big blue wall-shaped wave to deal with; you can dash through this, but it’s often better to try to jump straight over it. Hold the X button to ensure you get maximum height. On the other side of the wave will be both orange bullets that move along the ground toward you, which are fairly well spaced out and can be slipped between, and bursts of blue bullets Ixion will blast out from its hands that make being in the air a bit dicier. Ixion will fire off three or four bursts of this attack, but none of these are hard to dodge so long as you’re able to reliably get over or through the blue waves.
After that, Ixion will take to the air again and fly at you from the sides of the arena, blasting out two blue wall waves and a spiral of bullets that fill the area between them. Watch the ring around Selene’s head for an indication of where Ixion is coming from so you can get clear of its initial swoop; using headphones and listening to the direction Ixion is coming from is also really, really helpful here. The boss will cross the arena in a straight line, so identify where he’s coming from and get well to the sides of it, then jump or dash through the blue wave it leaves behind. It’ll do this three times in succession, but it seems like it always comes from the same direction once he’s committed, so stay where you were safe and repeat your dashes.
Now Ixion will hover around the arena, blasting bursts of blue bullets at you before dashing away, just like in the first phase. However, the blue bursts will be more sustained and aimed a little better, so keep moving sideways and dodging to avoid them. If you can hit Ixion in the head here, you can stagger it out of these attacks, so keep up the fire whenever you can.
When it’s not shooting straight at you, Ixion will fire a ton of blue bullets back and forth across the arena like a sprinkler passing back and forth over a lawn. If you stay far enough back, you can position yourself to pass between the spaces between the bullets without issue; if not, dash through a group quickly and reposition. Try to go forward or back, though, and not sideways.
As it nears the end of this phase, Ixion will trade its blue bullets for those tracking blue rockets, firing a heap of them. Run sideways or dash hard to one side to get clear–these come fast, although you can get past them if you force them to track you as you move left or right relative to Ixion. It’ll also fire a big blue laser beam in a straight line in front of it , just like Phrike did; move sideways quickly and you can avoid both.
Phase 3
Ixion will take to the air again and come down in the center of the arena, kicking off the waves you dealt with at the start of the last phase. This time, though, the bullets he shoots from his hand will come out in an angled disc formation, making it tough to jump up and over bullets. Try to keep moving to the side where the high edge of the disc is and you can avoid these altogether; if they’re angled right at you, you’re probably going to take a hit. Luckily, this part lasts only a second before Ixion moves on to something new.
Here, Ixion pulls a melee weapon from its chest, a sort of whip. This is the most dangerous portion of the fight–Ixion will be on the ground and stalking directly toward you instead of flying around in the air in random directions. The boss will then jump straight at you and come down with a melee attack. Dash away and run from it, as the attack will also release a short burst wave of red energy. It’ll likely try to strike you again, but if you’re moving away, you should be able to dash clear of the second strike as well. Hop to get over the first two waves as they catch up to you and watch for Ixion to shoot a third red wave at you as well.
Ixion will then charge up and start slapping the whip against the ground, sending more waves your way. These are slow and thus easy to jump over, but use the time to get as much distance from Ixion as you can. It’ll now take shotgun-like shots of bullets at you, alternating blue and red. The blue bullets are the dangerous ones; they come fast and straight at you, and you’ll need to dodge them. The red ones are more of a red herring (heh), as they’re super slow and spread out over time, and thus easy to sidestep. They’re meant to confuse you as you prioritize dodging fire, though–pay closest attention to the blue shots and use your speed to avoid them, and keep your distance from Ixion to give you time to recognize and avoid the red ones.
Get ready for more melee attacks from Ixion at this point–you’ll want to run for it, hopping to avoid the red waves and running and dodging to get clear of it as he takes multiple swings at you. Finally, it’ll start to stalk toward you, dashing to close the distance and releasing rings of bullets in your general direction. Hop, dash, and run to get away from it; head toward the side of the arena he’s not and you should be able to get distance on it to avoid these attacks. If you’re keeping up the fire, it won’t be long until you take Ixion down.
Nemesis
This big boss is actually pretty easy once you get the hang of fighting it. It’s recommended that you bring a strong, long-range gun to this fight, however–the Thermogenic Launcher is a good one in particular, but shy away from things like the Sidearm or anything with an arc in its trajectory. You’re going to need bullets to cover a long distance accurately, so keep that in mind.
Phase 1
First, Nemesis starts launching stuff at you as you stand on a big platform in front of it. Shoot the big red spot on its chest–that’s your weak point, and where you’ll be aiming for the duration. The first few attacks are easy to deal with, as Nemesis fires bursts of orange bullets at you and volleys of purple rockets that you can avoid by running sideways. It’ll fire more bullets at you in general, but all of these are pretty easy to handle while strafing.
What you need to be worried about are the four puppet-like things floating around Nemesis. One by one, these will float down toward the battlefield and shoot straight laser beams at you. They’ll first start high, cutting a beam at a diagonal across the middle of the battlefield while Nemesis throws waves of blue bullets; prioritize dodging the beams and slip between the rows of bullets, as they’ll be very spaced out.
After two puppets fire diagonal lasers, one in each direction, another two puppets will come at you, one at a time. These will go down parallel to the ground to sweep their lasers across the entire arena. You’re going to need to dash through them to avoid them, so stay back so you can avoid Nemesis’s bullets after you’re clear of the beams.
When all four puppets have swept the arena, Nemesis will shift to bursts of blue bullets aimed at you, while its puppets shoot lasers straight at the arena, which will release waves of red energy. Watch where the waves are starting from so you can hop over them; you’ll need to do so while keeping clear of the bullets Nemesis has aimed at you, which will be potentially deadlier because they’re targeted. If Nemesis is still up after one puppet creates three red waves, it’ll send two puppets to start cutting beams across the center of the battlefield. Avoid these by staying to one side and keep laying on the fire to try to end this phase quickly.
Phase 2
Next, Nemesis starts teleporting around the arena, which shatters and splits into pieces. You can use your grapple to move around here, and pointedly, if you fall off, you can use it to catch yourself and get back; look for the grapple points on the ledges behind you when you’re facing Nemesis, as these are usually easier to snag.
You can identify where Nemesis will be by where the puppets arrange themselves. Get in position for the fight and start wailing on the weak point. Keep moving from side to side to dodge the bullets Nemesis sends your way.
Again, the puppets’ laser beams will be the more dangerous attacks. Nemesis will send two to shoot their beams straight at the arena to create red energy waves for you to doge, all the while continuing to fire at you. If a single puppet comes down, it usually means you can expect a beam to sweep all the way across the arena; if there’s a puppet on each side of the arena, you’ll get two energy waves (two sets of two together); and if two puppets are on one side of the arena, you’re going to get two beams cutting across at a diagonal in rapid succession. Dash through the beams and watch out for Nemesis’s many bullets in the meantime.
Toward the end of the phase, NEmesis will start heaving a ton of extra bullets at you that will be tough to avoid, especially in concert with the laser beams. Try to stay back from the boss to slip between the gaps; you can fall back to other platforms if you have to, or hop off the side of the arena in an emergency and save yourself with the grapple.
Phase 3
This is where things get bonkers. Nemesis will explode, turning all the platforms into a series of falling blocks, while sending you falling through the air. The fall might panic you for a second but unless you go very, very far down, you won’t descend too far and die. That means you’re free to jump off platforms whenever you need to–in fact, this is a great way to avoid Nemesis’s bullets and laser beams, as the platforms can often act as cover. Your grapple will save you when you need it. In fact, the grapple is as good as a dash. It protects you from damage when you’re using it in most cases and can reposition you very fast. Use it to get out of danger and don’t be afraid to get aerial.
Open fire on Nemesis no matter how far away you are–remember when I told you to bring a gun with good range? You can hammer the boss quite a bit, but slowly make your way toward it. Your first clear and present danger are the puppets, which will shoot lasers at you as you approach. They’ll target you directly but they’re easily avoided, so just look for when one is readying to fire. Use platforms and the rapple to zap clear and you shouldn’t ever take a hit from one of these.
As you near Nemesis, it’ll start sending all kinds of bullets at you, and they track a bit better than in the past. The blue bullets are generally easily avoided–dive off the side of a platform if they’re coming in too hot. The orange bullets, however, will home a bit more and are more dangerous when you’re in the air, so make sure you’re using the grapple, rather than just freefalling, as you make an easy target. Keep firing but try not to get too close to Nemesis, as he’s tougher to dodge when you’re right up close to it. After a bit, he might explode again, sending you flying to the back of the area and forcing you to close the distance again–but just repeat the process from before and you’ll be fine.
The other thing to avoid are Nemesis’s blasts of purple rockets. These can come either in tight volleys or in huge groups, but the big groups are actually another distraction. When you see a giant bloom of purple rockets, know that there’s actually a group of only four or five at the very center that are actually dangerous and actively coming straight at you; the rest are going to fly off around the edges of the area, so just dodge the core group. It can be tough to see them, but as a big rocket blast is coming in, use the grapple and you can zip yourself out of the line of fire without incident.
Even when you’re falling, keep firing on Nemesis and you should handle this last phase with relative ease.
Hyperion
This might be the toughest boss in the game. Hyperion really leans into the bullet-hell genre’s moniker, throwing all sorts of stuff your way throughout this fight. The good news is that the boss stays mostly stationary, meaning it’s easy to hit it continually with fire and to strafe back and forth to avoid its attacks. The bad news is that they are many, varied, and wide-reaching–constant motion is a must, as is the ability to read attacks coming in at all different altitudes, including far overhead.
Phase 1
Of course, the first phase is the easiest, specifically because Hyperion stays in one place the entire time–the back of the arena, at the organ. Unload on it constantly while you dodge the attacks it fires from this one spot. Get used to running side to side from one end of the arena to the other, as this is the best way to avoid a lot of its incoming fire. You’ll also need to get used to jumping and dodging forward so that you can land clear of danger, as Hyperion fires a lot of bullets that track across the ground, making your landing zones perilous.
Stay well back in the beginning of this phase, as Hyperion likes to use several attacks in tandem so that it can be hard to prioritize which to dodge and when. Watch for blue rockets matched with a red energy wave to start, which you can strafe and hop fairly easily, especially if you move from the center toward the sides of the arena. Later, you’ll get the rockets, energy wave, and a laser beam that sweeps the arena all at the same time, but varied just enough that you can strafe the rockets and dash through the beam to protect yourself.
When it’s not doing that, Hyperion will shoot a plume of bullets that will fall toward the ground around itself, while also launching a heap of untargeted bullets into the air. If you stay back, you can generally avoid all of them without too much trouble, but it’ll likely limit your movement so get ready to use the dash to mitigate incoming damage.
At about a quarter health for this phase, Hyperion will lean into the organ, firing a mess of bullets from its pipes. These come in arcing blasts of different types; some will just flutter down in loose groups, some will stay in tight vertical lines, and some will be rockets that track you. Keep strafing and dashing sideways, prioritizing the rockets; you can keep away from the loose bulasts fairly easy if you gauge about where they’ll drop, and make sure to stay between the vertical lines. Keep firing this whole time to end this part of the phase as fast as you can.
Phase 2
Here’s where things get bonkers. Hyperion leaves the organ and comes to the center of the arena, where it’ll stay put, launching all sorts of intense volleys at you. Never stop moving and strafing, but stay well back from the boss. This whole time, Hyperion will flood the arena with random bullets spraying out in all directions around it, but you can mostly ignore these–they’re meant to crowd your vision but aren’t targeted and mostly are pretty thin, so just be sure not to accidentally smack into one.
When you see blue and Hyperion swinging its arms, start running sideways and dodging–you’ve got rockets incoming, and a lot of them. Hyperion will follow this up with another plume of bullets that fall toward the ground around it, but when you see it raise his arm straight up, start dashing again. The boss calls on vines from the ground to snag you, slowing your movement and damaging you, but if you’re quick you can get clear and avoid them altogether. Hyperion will attempt to use the opportunity of having you slowed to hit you with two big blasts of bullets arrayed in a cross–pick a direction and sprint sideways, dashing to come through the attack without taking damage. The cross covers a really, really big area, while moving very fast, so you really need to commit to dodging it.
Hyperion will send more bullets along the ground while replicating the cross with his tracking rockets. You can run and dash clear of it generally, but it’s a big attack as well, and you might need to jump to get over the horizontal group of bullets.
Keep hammering Hyperion and you should send it back to the organ again. Expect the same set of dangers as last time, but with more variants this time–the rockets are still your priority, but you can’t get too far out to the sides because bullets are dropping like rain on the edges of the arena, and you’ll now have waves of bullets moving along the ground. This is where jumping and dashing toward Hyperion will serve you well, so you can land clear of any danger. Just keep firing. The faster you’re through this section, the less damage you’re likely to take.
Phase 3
If you thought that was nuts, get ready for this–if you’ve got healing items, you’ll probably need them at the ready here. Hyperion again comes out to the center of the arena and will do everything previously mentioned, but with scarier, more intense variations. Hyperion will send bullets to the sky that will rain down in diagonal patterns, then send more bullets tracking along the ground toward you, and then try to grab you and hold you with vines, so keep moving and be ready to dash before the ground erupts beneath you. It’ll also fire more big X-shaped blasts of bullets that come in fast, but you can side-step or dash past those relatively easily. It’ll continue with X-shaped blasts in groups of two, but it’ll try to anticipate your direction and shoot them where you’re headed; if you quickly change direction and strafe the other way, you can avoid them.
One of the most damaging things Hyperion will do here is call up a mess of plants to create a walls on either side of you, walling you into a narrow hallway. Stop moving when you see it bend over, as that’s the telegraph for this move, and the walls will damage you if you touch them. Next, stand in the center and watch for Hyperion to send vertical waves of bullets at you; you should be able to sidestep them. As you’re dodging these, watch near Hyperion’s feet for a charge of energy–as the walls fall, Hyperion sends a blast of bullets low to the ground that spread out horizontally and these are very tough to dodge. As soon as those walls drop, dash clear.
Hyperion will again summon the cross-shaped attacks of rockets, but in rapid fire volleys. Try to dash toward Hyperion when these groups come, as the vertical group of rockets is fairly easy to avoid but the horizontal group will angle down and often nail you, even if you try to jump them. Hyperion will pair these with a red energy wave, so don’t forget that as you plan your landing.
Keep hammering Hyperion to try to limit the number of times you have to deal with any one of these attacks and you’ll send it back to the organ one last time. As mentioned before, this is a mad dash to do as much damage as you can before you’re overwhelmed, because there’s a lot happening here. Stay back from the boss–get too close and it’ll summon the vines again–and keep sprinting around to try to lose the blue rockets as you unload. You’ll still have to deal with vertical waves of bullets, groups of bullets falling in a tight area, and waves of bullets spreading out from the boss on the ground, and you’re probably going to take some hits here. If you’ve got any consumables for health, healing, or protection, this might be an emergency worth using them.
Keep up the damage, though, and you’ll eventually outlast Hyperion and silence the music.
Ophion
Ophion is a bit of a different speed from the other bosses, as it has several weak spots on its body, and you’ll have to destroy all of them in each phase to advance–which means you need to hammer a spot until it’s gone, a tougher targeting requirement than any other boss has had up to now. What’s more, you’ll need to reveal those weak points by shooting the glowing white orbs floating on the sides of the boss, and they’ll periodically disappear, requiring you to continually target the orbs to reveal them again.
Generally, any sustained fire weapon is good for this fight, but I really like the Thermogenic Launcher with rapid fire. It allows you to spray a lot of explosive damage with a fair degree of accuracy at the boss very quickly. Note however, that it’ll often cover its chest with its hands to obstruct your aim.
Phase 1
Your dash is actually much less useful than usual in this fight, because Ophion employs laser beams you can’t dash through. Thes will come in straight beams emanating from portals the boss deploys in front of it, as well as in waves that come from impacts when it smashes its tentacles on the ground. Because of this, you don’t want to stray too far to the sides of the arena in this part of the fight; Ophion’s tentacles are a problem and they’re very big, so you’ll probably get smashed by them if you get too close.
Nail one of the white orbs to start the fight and watch for its field to disappear every so often; whenever that happens, shoot another one, so that the weak points on Ophion are constantly revealed. Try to pick one and focus on it until it’s gone, then move on to the next one, as it’s a bit easier to keep track of what you need to destroy if you don’t fire haphazardly at the boss.
Ophion summons bullets and lasers from portals, while also smashing the ground to send purple energy waves your way on the ground. You can deal with these by jumping, not dashing–your underwater jump gives you the height to get over them and you’ll still take damage if you dash through, so get vertical. Watch out for multiple waves crossing at the arena at the same time and pick your landing spot.
While you’re dealing with that, Ophion will shoot bullets at you either in haphazard sprays that go everywhere, or in tighter grids that you can dash through and avoid. Try to get through these while in the air jumping over the purple waves and you’ll be better able to choose your landing position. Watch out, though, for Ophion to open a bunch of portals roughly in a straight horizontal line, all of which will spit bullets directly at you–sprint sideways or dash forward or sideways to get clear.
Generally, everything Ophion throws at you in this phase, you’ve seen before. In addition to the grid formations, spray patterns, and blasts of bullets, you’ll also get those tracking rockets that you can easily dash past or outrun. The most dangerous attacks are undoubtedly the energy waves, as well as beams that Ophion will shoot from portals, starting high in the air and then dropping down. Again, you can’t dash through these, so get between the beams and jump to avoid the simultaneous waves. Dealing with these attacks is all about placement and spacing, so just focus on staying away from and between them.
A lot of the bullet-based attacks can be dodged simply by sprinting hard to one side of the arena or the other or using your increased jump height, so keep moving and jumping over the energy waves and keep firing until all the weak spots are destroyed to trigger the next phase.
Phase 2
Ophion trades tentacles for hands in the second phase, and they’re a lot more present in the battle. It’ll reach into the center of the arena and smash down with one or both hands, trying to either hit you with its hand or nail you with the purple energy waves created by the impact. All this takes up a ton of room in the middle of the fighting area. It’ll also sweep a hand across the entire arena from one side to the other. You need to avoid those, so if you’ve been fighting relatively close to Ophion up to now, move to the back of the arena, almost to the wall, and prepare to use the sides a bit more.
When it’s not trying to nail you with one giant hand, Ophion is spraying lots more bullets at you from portals this time. The rocket volleys increase in volume, and the boss will pair scatterings of bullets to fill the air with purple beams criss-crossing the arena and taking up a lot of space, which you can’t dash through. Both of these are best dealt with by sprinting hard to the sides of the room, while trying to be conscious of Ophion’s hands–you don’t want it smashing you with one while you’re over there, but the rockets and beams have a hard time threatening you when you’re far to the left or right of the boss.
Along with the bullets he shot at you last time, Ophion has new tricks for those purple laser beams. It’ll send them across the arena from up in the air downward, moving at diagonals and in large groups. You’re going to want to try to strafe sideways across the arena toward them as they come down to you so you can pass beneath them. They’re not too hard to avoid especially if you make it out to the side of the arena, where fewer will get near you. Ophion also summons beams to track along the ground horizontally, sweeping the arena so that you have to jump over them.
As opposed to the beams in the air, you don’t want to be at one side of the arena when this happens, because that’s where the beams tend to start and they’ll nail you as soon as they erupt. Try to stay somewhat centered as soon as you’re clear of the beams dropping through the air, and make use of your elevated jump to avoid the sweeping ones. Along with those sweeping beams, Ophion likes to shoot a heap of bullets at you from several portals at once, so get ready for a quick dash in the air when you see those beams pop up. Keep hammering the weak points until they’re all gone again, triggering the last phase.
Phase 3
In this phase, tentacles are back, as are the impact waves they create when they hit the arena. But now Ophion will target you with those purple lasers directly, so get to sprinting to stay clear of them. Most of what it throws at you from here on out will be combinations of things you’ve seen before–grids of bullets paired with direct blasts of them, for instance. With all the slower-moving bullets, they’ll seem overwhelming until you realize how slow and spaced out they are. Stay in the back of the arena and slip through the gaps.
The tough attack is when Ophion summons a ton of portals at once to shoot a spiraling blast of bullets at you that cover a huge area, coupled with a massive circular volley of rockets, and direct, targeted masses of bullets to go with them. Essentially, this is a mess, and you should just sprint for the sides of the arena to dodge as much as you can. When you run out of room, change direction, dash straight back through the incoming fire, and sprint back the other way. Everything should move slowly enough that you can probably avoid most of it if you’re quick, but speed here will be essential, because most of the arena will be a death trap during this attack.
The last item you’ll have to worry about is a new orientation for the purple lasers, which Ophion will send your way arrayed in two spinning windmills of death. The lasers will cut across the arena as they spin, but you can pretty easily step through and past these wheels if you have enough opportunity to time it accurately. Stay toward the back of the room and watch them, then move forward to get past them, all the while firing away at weak points.
Ophion mostly just looks scary, thanks to those easy-to-nail weak points, though. Keep destroying them, and you’ll send it back to the depths in no time.
Click To Unmute
Size:
Want us to remember this setting for all your devices?
Konami has claimed the mantle of “first game publisher to pull out of E3 2021,” formally announcing its decision on Twitter.
The tweet explains that Konami–originally announced to be an E3 2021 attendee in early April–“will not be ready to present at E3 this year.” The statement also tells Konami fans “we are in deep development on a number of key projects, so please stay tuned for some updates in the coming months.”
In a statement to GameSpot, an ESA representative said the following: ‘We support our partner Konami’s decision to not participate in E3 this year and are excited to see what they’ll be announcing in the future when they’re ready to do so. We can’t wait for their return to E3 2022, but in the meantime, we look forward to sharing all of the highly-anticipated reveals, programming and so much more at this year’s E3.”
E3 2021 has been confirmed as an all-digital event, to be held June 12-15. Companies that have signed on to the event include Xbox, Nintendo, Capcom, Ubisoft, Take-Two Interactive, Warner Bros. Games, and Koch Media.
Like other roguelikes, the question of how long it’ll take you to “beat” Returnal in part comes down to a combination of your personal skill and the luck of the draw. Weapons, upgrades, and health drops are all randomized, as is the map you face on each run and the challenges that might stand in your way. So how long it takes you to hit the credits is going to come down to whether you get a series of solid runs or not and how much difficulty you find in the bullet-hell battles developer Housemarque throws at you.
But there are more caveats to the length of Returnal as well. Though it’s not immediately apparent, the game is divided into sections, with some key story developments dividing up the experience. The end of the first section leads to significant changes in the game, creating something of a midpoint from there on out. After the next section, you’ll see the credits and an ending cutscene.
However, there’s more to uncover in Returnal after that point. So with all those exceptions in mind, here’s a rough idea of how long it’ll take you to complete each of the big portions of Returnal and how much time you will likely sink into the game.
How Long To Beat Returnal?
Critical Path
Again, experiences are going to vary wildly on this front, but I managed to clear the first section of Returnal in around five hours. The second section is roughly the same length, but a fair deal tougher. The requirements for moving forward are also more involved, so you can expect this portion to take longer to beat.
Altogether, though, to get to the credits, a decent player with some solid runs can probably expect to commit 12-15 hours. You can get there quicker if you avoid exploring and forego searching for audio logs and other story collectibles. Returnal’s mapping system is also good about identifying doors that will take you along the path to your goal, as opposed to side rooms that might have extra fights or additional drops in them, if you’re looking for other things to avoid to speed up your progress.
Completionist Path
Once you roll the credits, though, Returnal will send you right back to the start of another cycle with new elements unlocked. You’ll also still have some unanswered questions, suggesting there’s more to see. We won’t spoil what happens here, but you can uncover more of Returnal’s story by exploring the areas you’ve already visited.
To uncover all of Returnal’s secrets and find all its story collectibles to get the full picture, you can expect to spend a lot more time in the game. That’s partially because some collectibles are locked behind the random, procedurally generated nature of each biome’s map, so you’ll need to visit them several times to find everything. After the credits roll, expect to push your total count up to 25-35 hours or more, depending on luck, skill, and exploration choices. Let’s just say that there’s a payoff for the time spent, though.
“Cozy” probably isn’t the first word you think of when PUBG comes to mind–“guns”, “battle to the death”, and “explosives” are more likely–but in the latest patch, you can now don pajamas along with your friends with the new Survivor Pass that arrives with PUBG’s latest update. You can check out the patch notes at the bottom of this article; the update is live now on PC and is coming on May 6 to consoles.
PUBG Update 11.2 adds a Pajama Party Survivor Pass to let players switch things up with all manner of nightwear. You can acquire up to 30 awards by progressing through the pass, most of which are PJ-themed as shown off in the update video below.
In addition to the Survivor Pass, this update also includes an overhaul to two specific bridges on the Arangel map. Several structural features have been modified, including an addition of staircases and a repositioning of a dump truck. While these might seem like small changes, any geographic change on PUBG maps can have big ramifications for players who may have played these maps hundreds or thousands of times.
Finally, the patch includes a set of game balance changes, bug fixes, and other various improvements. These range from animated nameplates now available for purchase to game stability tweaks. You can see the full patch notes below.
PUBG Update 11.2 Patch Notes
World Changes – Erangel Military Island Bridges
The iconic bridges between Erangel mainland and Sosnovka Island have been given an upgrade.
The two bridges connecting Sosnovka Island and the Erangel mainland have had major changes, including additional cover and widening of the bridges.
Catwalks have been added, providing additional avenues to both defend and attack from.
The dump truck has been repositioned.
Survivor Pass: Pajama Party
Survivor Pass: Pajama Party can be purchased within two different item packages.
PAJAMA PARTY WEAPON PACK (990 G-Coin).
Premium Pass + The Big Sleep – AUG weapon skin.
PAJAMA PARTY WEAPON AND LEVEL PACK (3270 G-Coin).
Premium Pass + The Big Sleep – AUG weapon skin + Lv.30 coupon.
Survivor Pass: Pajama Party provides over 30 rewards as players progress through 50 levels.
You can earn XPs by playing matches and completing missions. Additional levels can also be purchased with G-Coin.
Survivor Pass: Pajama Party has the following mission types.
Survivor Pass: Pajama Party will begin on April 28th 11:00 KST and end on June 9th 11:00 KST.
Claim your rewards before the pass ends, as there is no-longer an additional grace period to claim rewards once the season ends.
Gameplay and Balance
In-vehicle recoil has been increased by 10%.
This change does not apply to sidearms.
Reputation System Balance Adjustment
Spamming multiple reports through the replays system no-longer unfairly impacts the targeted player’s reputation level compared to regular reports.
Set an upper limit to the amount of reputation loss per match to prevent misuse, especially in situations where multiple pre-made squad members report their random teammate.
Increased the potential number of reputation points available for players with reputation level 1 or below.
Also increased available reputation points for players at reputation level 4.
SLR Muzzle Update
The Flash Hider model on the SLR has had major improvements to its visuals.
Match History and Match Report Improvements
Improved the overall page design and rearranged certain elements for better visibility.
Increased size of the map images.
Improved icon design for Last 20 Match Stats details.
View Report is now displayed only when hovering over each match entry.
Your Placement Trend is now displayed as a line graph, rather than a bar graph to give a more clear picture of your results.
Replaced Avg Kills with K/D Ratio.
Added Assists to the list of recorded stats.
Assists have also been added to Match Reports.
Performance Improvements
Improved client performance by disabling certain voice chat related features when voice chat is disabled.
Improved client FPS stability through a reduction in hitches related to optimization work.
Optimized CPU performance by adding additional multi-threaded rendering support.
Optimized CPU performance through animation optimization.
Optimized some server and client performance pipelines to reduce both server and client hitches.
Items and Skins
Adjusted the tier of certain common, gray rarity items to improve consistency among similar item types. The adjusted items are now exchangeable for 60BP each.
The following items will be removed from the shop after maintenance on April 29.
Nameplates–500 G-Coin (Available April 28, 2021–April 27, 2022)
Vikendi Birb
Hand Drawn Holdup
Dogs of War
Searchlight
Feline Fury
Retro Ride
Bark at the Moon
Nameplates Batch 2–500-GCoin (Upcoming, available May 19, 2021–May 18, 2022 )
Two Smoking Barrels
Adrenaline
Julie
The End
Animated Nameplate animations will be active on following screens:
Career > Survival
User Profile
End-game screen – Opponent’s PUBG ID
Spectator – Spectating player’s PUBG ID
Death Cam – Killer’s PUBG ID
Animations are not active on the following screens:
Match Report > Survival, Overview
Team info in the in-game system menu
Sheepover G-Coin Value Pack–1050 G-Coin (Available April 28–June 9, 2021)
Sheepover Sleep Mask
Sheepover Pajama Top
Sheepover Pajama Shorts
Labor Day Sets (Availble April 28–June 9, 2021)
Bundle and individual item prices are displayed below.
Streetwear Bundle (990 G-Coin)
Hipster Jean Jacket (700 G-Coin)
Hipster Skinny Jeans (350 G-Coin)
Hipster Canvas Shoes (150 G-Coin))
Coffee King Uniform Bundle (900 G-Coin)
Coffee King Hat (200 G-Coin)
Coffee King Apron (200 G-Coin)
Coffee King Leggings (700 G-Coin)
Sporty Bundle (1090 G-Coin)
Retro Track Jacket (700 G-Coin)
Her Galaxy Shirt (200 G-Coin)
Her Galaxy Shorts (350 G-Coin)
Soccer Cleats and Socks (Teal) (150 G-Coin)
Victory Dance 48 (500 G-Coin)
Victory Dance 49 (500 G-Coin)
New Worker’s Gloves
Worker’s Gloves (Yellow) (300 G-Coin)
Worker’s Gloves (White) (300 G-Coin)
Worker’s Gloves (Black) (300 G-Coin)
The Greatest Show on Erangel! Circus Sets
Bundle and individual item prices are displayed below.
Circus Star Bundle (1290 G-Coin)
Circus Star Uniform (1190 G-Coin)
Circus Star Shoes (200 G-Coin)
(Bonus) Circus Star Hair
(Bonus) Circus Star Makeup
Ringleader Bundle (1490 G-Coin)
Ringmaster’s Tophat (300 G-Coin)
Ringmaster’s Jacket (990 G-Coin)
Ringmaster’s Vest (300 G-Coin)
Ringmaster’s Pants (500 G-Coin)
Ringmaster’s Boots (200 G-Coin)
Sideshow Bear Costume Set (1290 G-Coin)
Sideshow Bear Mask (600 G-Coin)
Sideshow Bear Costume (800 G-Coin)
Sideshow Bear Feet (200 G-Coin)
(Bonus) Clawing Grizzly – Emote
Harlequin Helmet Pack (1000 G-Coin)
Harlequin–Helmet (Level 1) (500 G-Coin)
Harlequin–Helmet (Level 2) (500 G-Coin)
Harlequin–Helmet (Level 3) (500 G-Coin)
Harlequin Weapon Pack (1980 G-Coin)
Harlequin–AKM (990 G-Coin)
Harlequin–SLR (990 G-Coin)
Magic Bullet–Groza (990 G-Coin)
Bigtop Backpack Pack (1000 G-Coin)
Bigtop Backpack (Level 1) (500 G-Coin)
Bigtop Backpack (Level 2) (500 G-Coin)
Bigtop Backpack (Level 3) (500 G-Coin)
Victory Dance 50 (500 G-Coin)
Explore Rugged New Looks: EXPLORER Sets (Available May 26, 2021–May 25, 2022)
Pathfinder Outfit Set (1190 G-Coin)
Pathfinder’s Uniform (700 G-Coin)
Pathfinder’s Skirt (700 G-Coin)
Pathfinder’s Shoes (150 G-Coin)
Survivors Biker Outfit Set (1190 G-Coin)
Survivors Biker – Helmet (Level 2) (300 G-Coin)
Survivors Biker Vest (700 G-Coin)
Survivors Biker Shirt (200 G-Coin)
Survivors Biker Jeans (350 G-Coin)
Survivors Biker Shoes (150 G-Coin)
Hiker’s Outfit Set (1190 G-Coin)
Hiker’s Neck Scarf (350 G-Coin)
Hiker’s Overshirt (700 G-Coin)
Hiker’s Shorts (350 G-Coin)
Hiker’s Shoes (150 G-Coin)
(bonus) Hiker’s Tanktop
“Range Shredder” Zima (990 G-Coin)
“Snake Hunter” BRDM (990 G-Coin)
Victory Dance 51 (500 G-Coin)
Victory Dance 52 (500 G-Coin)
Streamer’s Pack–MOZZ (Available May 5–July 28, 2021)
MOZZ’s Pack (1340 G-Coin)
MOZZ’s Dress (1000 G-Coin)
MOZZ’s M24 (990 G-Coin)
Replay System
The replay system has been updated. Replay files from previous updates are now unable to be used.
Bug Fixes
General Fixes
Fixed an issue where regular players could make certain changes, or take certain administrative actions on other players custom games.
Fixed an issue where raindrops formed on vehicles when located indoors with overcast weather settings.
Fixed an graphical issue which caused awkward movement of your character’s left arm when equipping a weapon in slot 2.
Fixed an issue where bots firing a weapon would cause the sound to be played twice.
Fixed an issue where vehicles could not drive through and properly destroy small fences (mainly on Erangel), allowing them to affect vehicle movement/positioning.
Fixed an issue where Panzerfaust’s backblast was shorter than intended.
Fixed an aiming issue in FPP when a player aims at a certain direction in a passenger seat of Pick up truck, causing a visual issue.
Fixed the inaccurate shape of the Duckbill attchment.
Fixed the issue where depleted Jammerpacks could be fully restored after using the Emergency Pickup feature.
Fixed the issue where players could interact (looting items, opening doors etc.) through an unbroken window.
Fixed an issue with the Motorbike and Mirado sliding or shaking up and down.
World
Fixed multiple world related bugs in Camp Jackal (Training Mode).
UI
Fixed the error message displayed when sending a friend request to a bot.
Fixed the issue where helmets and vests appear in a broken state on the inventory screen while their durability is still above 0.
Fixed an incorrect system error message displayed when navigating to the Survival page.
Skins and Items
Fixed the clipping issue with other items when equipping the PGI.S Beast-Mode Mask item.
Fixed a texture with the PGI.S COLORSHIFT items when viewed on the Career – Weapons menu.
Fixed the invisible texture displayed when equipping the Crash Test Handwraps item.
Fixed the clipping issue which occurred when equipping both EVENING BLOOM DRESS BOX and Major Trouble Jacket (Green) items.
Fixed the awkward loop animation for Victory dance 43.