Spiral: From the Book of Saw is the worst of both worlds. It’s a hollow mimicry of the Saw series, unlikely to satisfy long-time fans, but it has just enough gory, Saw-like material to alienate general audiences. It is also, simply, not good enough on its own terms to qualify as a competent work of art — or even a competent studio product churned out on a conveyor belt and squirted with a dash of familiar franchise flavor. To make matters worse, it grasps at social relevance and weighty, moralistic messaging in a manner that feels downright mystifying.
Granted, it wouldn’t be the first Saw film to attempt this. Saw VI, the last enjoyable entry, took aim at America’s broken healthcare industry by placing a health insurance CEO in its central game, forcing him to choose which of his employees would live or die. Spiral, similarly, attempts to draw thematic connections between two forms of predatory death-dealing: Jigsaw traps, which force victims into self-mutilation in order to survive, and a brutal system of policing that shields itself from consequences, even when its officers kill people. The key difference, however, is that Saw VI knew how to have fun with its premise.
Spiral, the ninth entry in the series (and the second soft reboot in recent years), has an opening scene that promises an understanding of what made the series tick. It’s a simple, back-to-basics trap that pivots away from the large-scale Rube Goldberg torture houses of later entries. It’s gaudy, intense, and enjoyable in a way the series hasn’t been for ages, but everything tumbles downhill from there.
At the story’s center is Ezekiel “Zeke” Banks (Chris Rock), seemingly the only virtuous cop in a department of corrupt scumbags, and the son of a respected retired police captain, Marcus Banks (Samuel L. Jackson). Chris Rock originally approached Lionsgate with the idea for a new Saw film, and the final product feels like a vehicle for his talents, though not necessarily his dramatic ones. Zeke isn’t so much a real person in a tough predicament, but an evocation of the idea of virtue; when he’s introduced, he doesn’t speak in dialogue as much as he does in stand-up routines about divorce, as if Rock had simply re-used outtakes from his 2018 special Tamborine. It would be one thing if tapping into Rock’s comedic energy were the point — the marketing certainly seems to be courting mainstream moviegoers — however, Zeke puts on a serious face for the rest of the film once mysterious clues begin showing up at the station, and cops around him start being kidnapped and placed in Jigsaw games one at a time.
At this point, you may be wondering what the film’s central premise even is. I’m afraid I’ve just described it. The first Saw was an escape room; the second was an escape house; the third was a walkthrough of a hellish meat factory — and so on. Spiral, despite marketing itself as a Saw movie (or at least, Saw-adjacent), doesn’t actually have a central “game” of which to speak. It’s simply CSI: Jigsaw, with Zeke and his fellow officers responding to hints and discovering gruesome crime scenes while trying to figure out the killer’s identity.
Not only is the film un-Saw-like in structure, but it has a strange relationship to the Saw series’ sprawling continuity. The Saw sequels are usually obsessed with drawing tenuous connections and filling in narrative gaps through flashbacks. They’re incredibly sincere about it, too. It’s part of their bizarre charm. The Spiral trailers pose a central question about whether these new killings are the work of a copycat or someone connected to the original Jigsaw, John Kramer (Tobin Bell), which wouldn’t be too much of a stretch, since he recruited enough apprentices to have his work continue well beyond his death in Saw III. Spiral no doubt answers this question, but it does so gutlessly and guilelessly, simply stating it outright instead of unveiling it through its narrative.
Spiral treats its lack of structure, and its lack of narrative intrigue, as virtues. Sure, these are “unique” for a Saw film, but in the same way, having a Fast and Furious movie without cars would be “unique.” It even tries to highlight its supposed novelty by having Zeke say, of the original Jigsaw killer, that he “didn’t target cops,” even though he most certainly did. The central premise of both Saw II and Saw IV, directed by Darren Lynn Bousman, involved cops being the targets of Jigsaw games. Spiral was also directed by Darren Lynn Bousman. What gives?
The new killer has a bone to pick with law enforcement, and the film does, at least, draw a connection between the many pig masks throughout the series and these new targets (the classic “Billy” puppet is replaced by a pig puppet in police uniform). A few of the traps are fun if torture-porn is your thing. And while the monotone, robotic voice used by the new killer is a far cry from Jigsaw’s menacing rasps, the recorded instructions for each victim are suitably laden with puns, in a classically Jigsaw manner. If the recording mentions “pointing fingers,” you can pretty much assume which body part the trap will target.
However, none of this makes the film remotely interesting. Bousman certainly returns the color palette to the garish tones of the early series, but those dingy, primary washes worked for the sickly, claustrophobic enclosures of the initial films. Most of Spiral takes place out in the open. It follows cops moving from place to place, with scenes often ordered and connected incoherently, and the traps themselves don’t take up all that much of the runtime.
With the traps sidelined, and the series’ winding lore no longer much of a concern, there’s only one real Saw-esque target left for Spiral to hit: the plot twist. Every film in the series has one, and it usually comes out of left field, even if it needs to cheat to fool the audience. However, Spiral’s premise is that of a murder mystery, and it’s entirely about trying to uncover the killer’s identity from the start. Even if you don’t know the answer, the film asks the question so many times that it leaves little possibility for surprise. What’s more, the film doesn’t even have the decency to use Charlie Clouser’s “Hello Zepp” for its big reveal, the musical composition that has scored every one of the series’ twists till date (strangely, the film uses the track elsewhere, in a distinctly non-twist capacity).
Between its cast of Black A-listers (who barely share the screen), its hip hop and R&B heavy soundtrack, its 21 Savage remix of “Hello Zepp” and its focus on police brutality, the film clearly hopes to insert itself into the post-Get Out wave of socially-minded Black mainstream horror. Although, it does this about as deftly as the dopey slave-sploitation thriller Antebellum. It even goes as far as employing imagery evocative of police shootings, in a moment that tries (and fails, quite egregiously) to echo the social commentary of George Romero’s The Night of the Living Dead. You’ll know it when you see it, and good lord, is it mishandled.
And yet, despite all this, the film doesn’t want to actually confront the specter of race that looms over it, other than by having two of its lead characters be Black police officers (along with two other non-white supporting cops, played by Max Minghella and Marisol Nichols). For that matter, the film doesn’t want to confront any of its own ideas. Between its “Book of Saw” subtitle and the protagonist’s name, Ezekiel, it hints at some religiosity in its subtext, but apart from a trap that vaguely resembles the idea of turning away from fire and brimstone, à la the destruction of Sodom and Gomorrah — it’s a reach — these are mostly empty platitudes.
Spiral: From the Book of Saw is barely a Saw film, delivering only briefly on the visceral thrill of mutilation, and on none of the series’ other tenets. It’s also the most artless, tactless version of what it plays like instead: a rejected pilot episode for a rote police procedural.
There’s this side quest in the original Mass Effect where you must collect 16 ancient asari writings, which you do by scanning planets as well as landing on uncharted worlds and searching for them. It’s an awful collection task quest, deathly boring to do even with a guide. The reward isn’t even all that great, being nothing but some measly experience points. The saving grace being that because the whole thing is so meaningless, you can skip it without fear of missing out.
However, in Mass Effect 3, there is a small side quest on the Citadel for Shepard stan Conrad Verner. Turns out that before Conrad devoted his life to worshiping the Commander, he wrote a doctoral dissertation on xenotechnology and dark energy integration and can help Shepard obtain some ancient tech, tech that happens to be written in ancient asari dialect. If you collected 10 of the 16 asari writings all the way back in Mass Effect 1, you get some special dialogue as well as a plus five bonus to your war assets.
This is one of those rare moments most players didn’t fully experience in their Mass Effect trilogy playthrough: Strange or unique outcomes that required you to do something either really obscure to get or because you made choices in the past that fall in-between the cracks of the series’ mortality system. Most players tend to play a pure pure paragon or renegade playthrough, but if you mix and match you get some pretty interesting consequences. In this video, I’m going to go through a few of my favourite rare Mass Effect outcomes.
Originally this video was really long, so if you have other moments you’d love to see, or have your own favourites, drop them in the comments below or like this video and subscribe so we know you want to see more. It goes without saying this video contains spoilers for the whole series, except Andromeda cause I don’t talk about that game.
Mordin Lives
Mass Effect may be all about choice but some things are predestined. Some characters won’t make it to the end no matter what decisions you make. The first and most heartbreaking loss in Mass Effect 3 is Salarian scientist Mordin Solus, who is doomed to either sacrifice himself to cure the genophage, or betrayed by Shepard and shot in the back. Either way Mordin has to die.
Or does he? Yes! Mordin can live and you might be thinking “well that sounds like the best situation, I love Mordin and I would like him to live”, but the reality is to get this outcome you actually have to f**k up really badly.
Mistake number one: You killed Wrex back on Virmire, which means his bloodbrother Wreav is in charge of clan Urdnot. Wreav is both stupid and bloodthirsty and a future with him in charge of the Krogan may very well lead to another Krogan Rebellion. But that’s ok because with Eve at his side, she can help guide him in the right direction.
Mistake number two: You didn’t save Mealon’s research data in Mass Effect 2 and Eve is now dead. Or mistake 2.5, Eve dies because you didn’t stop the bomb on Tuchanka.
With Eve not around to keep Wreav in check, Shepard now has a pretty compelling case as to why it’s not a good idea to save the Krogan right now. This is enough to convince Mordin, who then fakes his death so Wreav thinks he died curing the genophage. He then assists in building the crucible, brings you a small boost to your war assets, and sends Shepard a nice little thank you email. You even get a final goodbye with him on Earth. But as far as everyone else is concerned Mordin is dead.
Was his survival worth the genocide of a whole species? I leave that up to you.
Salarian Councilor’s Death
Another tragic death in ME3 is Thane, who dies at the hands of series edgelord Kai Lang as he’s saving the Salarian Councilor. There is no way around this one. If Thane is alive in Mass Effect 3, he is fated to die here.
But what if Thane isn’t in Mass Effect 3? What happens to the Salarian Councilor? Well remember Captain Kirrahe from Mass Effect 1?
Kirrahe’s hold the line speech
Yeah that guy. You actually meet him briefly on Sur’Kesh, now Major Kirrahe. Congrats on the promotion. For most players this is just a nice little nod to the character, but for those who don’t have Thane around it’s actually a clever reintroduction and setup because, you guessed it, Kirrahe shows up in Thane’s place and saves the Councilor. You held the line good buddy.
Of course Kirrahe can actually die all the way back on Virmire if Shepard chooses not to help the Salarian squad by turning off a couple defenses. If that’s the case, well then the councilor just dies. Whoops. If this happens Udina will actually use doctored security footage to make it look like Shepard was the one to kill them, making it harder to convince Ashely or Kaidan. Speaking of…
Ashley/Kadian Refuse to join Shepard
Let’s touch on the fate of another pair of squad members, Ashley and Kadian, who’s roles are largely identical in Mass Effect 2 and 3 depending on who you saved. For simplicity we will refer to them as the Virmire survivor.
Their story culminates during Udina’s attempted coup of the citadel council. There is a hidden score based on a number of factors that will determine the outcome such as romance, saving the council in ME1, and how you’ve interacted with them in ME3. If you get a positive score, you can convince them of Udina’s betrayal and then get the option to have them join you on the Normandy for the rest of the game. If you end up with a negative score you can’t convince them and they’ll get shot by either Shepard or one of your squadmates. Brutal.
There is however a rare third outcome. It is possible to have a high enough score to persuade the Virmire survivor to back off during the confrontation with Udina, while simultaneously still having a broken relationship with them. This means they will straight up refuse Shepard’s offer to join the Normandy and can’t be a squadmate for the rest of the game. I didn’t even know this could happen until very recently, which just goes to show how much work and thought the devs really did put into these games.
Confused Liara (Saving her last in ME1)
Ok why don’t we want to take a break from all the death and sadness and talk about a more fun lighthearted moment in Mass Effect 1. One of the required missions of the game is to head to a Prothean dig site on the planet of Therum and find Dr. Liara T’Soni. Most players will head to Therum first as it’s what the game recommends and you’ll want Liara early if you’re interested in romancing her. But you don’t have to. You can wait. And wait. And wait.
In fact you can wait all the way until the ending of the game until there is nothing else to do but save Liara. When you finally show up it turns out she’s been trapped in the Prothean security bubble this whole time and is losing her goddamn mind.
You get a unique conversation where Liara believe’s Shepard is a hallucination followed by an equally hilarious scene back on the Normandy where you inform Liara that the plot of the game basically happened without her.
Party Member’s showing up as enemies in Combat (Legion, Jack, Morinth)
As we’ve made pretty clear so far in this video, party member death is a pretty major part of the Mass Effect trilogy. In Mass Effect 3 not only can many of the major characters die but often Shepard is the one who kills them, which makes a Renegade run pretty brutal. Most of this friend murder happens in cutscenes but their are several you can kill in combat.
The first being everyone’s favorite space psychopath Jack. After parting ways with Shepard, Jack becomes a teacher at Grissom Academy, a school for gifted biotics. A major side mission in the game involves rescuing Jack and her students from Cerberus, but it’s possible to ignore it. In Mass Effect 3 if you carry on with the main story you’ll get locked out of side content as time moves forward and this is taken into account, as Jack and her students are kidnapped by Cerberus.
When storming the Illusive Man’s base near the end of the game you’ll come across a special recording of Jack being tortured. Further in, you’ll find Jack, now brainwashed into a Phantom, and you’ll have to put her down.
Along the same vane as Jack is Legion. It was possible to give up Legion’s body to Cerbrus back in Mass Effect 2, a choice absolutely nobody made cause who’s gonna give up the chance at a Geth party member. We’ll if you did Cerbrus will indeed have kept the body and experimented on them. The empty shell that was once Legion shows up as a special enemy type in the Cerberus base, the same room where Phantom Jack also appears.
The final party member to talk about is Morinth, one of Samara’s Ardat-Yakshi daughters who you can side with in Mass Effect 2. Morinth was always a limited party member. She pretends to be Samara for the rest of Mass Effect 2 as to not arouse suspicion, which basically means she still says all the things Samara does outside of a few small moments.
With her being so limited in Mass Effect 2, it’s disappointing but not at all surprising that she doesn’t make a proper appearance in Mass Effect 3. Shepard gets an email from her, but that’s about it. However at some point in the game Morinth was found by the Reapers and turned into a Banshee. In the final battle on Earth Morinth will appear. She behaves just like any other Banshee and gets no special dialogue.
Romance with Javik and James
Everyone is horny for someone in Mass Effect and while BioWare does it’s best to make your dreams a reality, there are some party members you just can’t romance. Two of those were military beefcake James Vega and Prothean sadboy Javik, which a vocal group of fans were pretty disappointed with. Javik makes total sense to me. He’s the last of an ancient alien species with a really hot voice. He can throw me out of an airlock anyday. James on the other hand… well he’s not for me but he is voiced by Freddie Prinze Jr., aka The Iron Bull in Dragon Age, so I sorta get it.
BioWare must have heard the fan’s cries because they added two hidden “romance paths” in the Citadel DLC. During the big party, if FemShep doesn’t have a romance partner and makes certain dialogue choices they’ll wake up the next morning having slept with either James or Javik.
The Javik scene is played as a joke, but the James one I find genuinely creepy. Shepard can make several advances on James throughout the game but he always turns her down, making it pretty clear he’s not interested. Yet in the citadel DLC Shepard eventually resorts to getting James drunk enough so he’ll sleep with her. To cap the whole thing when they wake up in the morning he sounds like he regrets that it happened. Like what the f**k BioWare? I don’t think this is what the fans had in mind. If the genders in this situation were reversed this would have never made it into the game.
The Saddest Party on the Citadel
I don’t want to end this video on such a downer so let’s go back to the fun stuff; killing squadmates. During the previous section where the… bad thing happened, I mentioned the Citadel DLC and the big party you can throw at the end. Citadel was the final content made for the original trilogy. As such the whole thing is one massive celebration of it’s characters. BioWare went all out, bringing back the whole cast and stuffing in as many in-jokes as possible. As a finale to these beloved characters, you couldn’t ask for anything better.
But the thing is, Citadel’s charm is dependent on those characters, and what happens if none of them are alive? We’ll that’s what my co-worker Jake Dekker and I went on a journey to find out in our series The Saddest Party on the Citadel, a multipart let’s play where we planned out the murder of all our squadmates in order to get the fewest number of characters possible available for the party. Turns out there are three party members you can’t kill in the whole series; Liara, James, and EDI. That’s it.
This is a bit different from everything else we’ve been talking about. There isn’t extra dialogue or a new scene. The party goes on, exactly the same, except nobody is present. I don’t think BioWare expected anyone to actually play the game this way, but I love that it’s possible. It’s the ultimate example of what happens when you push this series emphasis on player choice to its limits. You get a sad Shepard, throwing a rubbish party for the only few people left they haven’t gotten killed.
So, as I said upfront, if you’ve got any rare outcomes you’d love to see us feature in a future video, let me know in the comments below. If you like Mass Effect, and if you made it through this video, it seems like you do, make sure to stick around, we’ve got plenty of it coming up on the channel.
Regina King blew us away as Angela Abar in HBO’s Watchmen, and now she’s diving back into comic books on the other side of the camera, directing the film adaptation of Image Comics’ race-themed Bitter Root for Legendary Entertainment, according to The Hollywood Reporter.
Bitter Root, created by David F. Walker, Sanford Greene, and Chuck Brown, tells the story of the monster-hunting Sangreye family during the Harlem Renaissance. Here’s Legendary’s official synopsis: “For generations, the Sangeryes have hunted and cured those infected by a supernatural force that feeds off of prejudice and transforms humans into monsters. But with most of the family gone, the remaining Sangeryes disagree over saving or killing the monsters.”
Legendary is calling the film a cross between Blade and Get Out. The book was nominated for an Eisner in 2019 for best new series.
In addition to directing, Regina King will produce along with Reina King and Ryan Coogler, among others. Bryan Edward Hill is rewriting the first draft. Regina King most recently directed One Night in Miami… and won an Emmy Award for 2019’s Watchmen show, our #1 show of 2019.
Marvel films carefully balance comedy, drama, and action. But for Dave Bautista, that meant leaving out big parts of Drax’s story, according to a new interview by Collider.
With two Guardians of the Galaxy films and two Avengers films under his belt, Dave Bautista has enough time as Drax to look back and think about what he wishes had been done differently.
“I really wish [Marvel Studios] would have invested more in Drax, personally,” Bausita told Collider. “Drax has a really interesting backstory which they dropped the ball on.”
“That’s no dig on Marvel,” Bautista added. “They had their slate, I know what they focused on.”
Drax was initially presented as a dangerous murderer with a tragic backstory–Thanos servant Ronan killed his wife and daughter–but became more and more of a goofball as time went on. It started with that line, “nothing goes over my head. My reflexes are too fast; I would catch it,” and culminated in Drax convincing himself that he’s invisible while (very) slowly eating a bag of chips. His tragic loss just never came up again.
“As a performer, that would have given me the opportunity to show different sides of Drax, emotionally. And physically as well. If you notice, Drax, although he looks like a badass…Drax gets his ass kicked more than any other Marvel character.”
“People just fell so in love with the comedic side of Drax that they tapped into that, then they tapped into it more, then they really dug a hole into it. But we missed a huge boat on that character.”
Despite those regrets, Bautista says he’s looking forward to filming the third (and presumably final) Guardians of the Galaxy film, which begins filming this year, and then releases in 2023.
“I’m really excited to wrap up this whole journey with these guys. I love the Guardians cast like family. They know it. I think everybody knows that I’m pretty vocal about it.
Click To Unmute
Size:
Want us to remember this setting for all your devices?
The Lego movie told us that we should throw out the instructions and, as Master Builders, make whatever we want. But for many, Lego sets are all about reliving our favorite things one brick at a time; in just a few weeks, fans of the NBC show Friends can with the upcoming Friends Apartments Lego set.
Set to arrive on June 1 (May 19 if you’re a Lego VIP), the new Friends set is in 2,048 pieces, including minifigs of the main cast (and Chandler’s ex-girlfriend Janice). With this set, you’ll be able to build out the apartments belong to Rachel and Monica, and to Chandler and Joey. It comes with all kinds of things to reference specific episodes, like that time Joey got a turkey stuck on his head or when a cat attacked Ross on the balcony. Phoebe’s dollhouse, Mrs. Braverman’s cheesecake, and the giant poking device are all there, too.
Lego hopes you’ll pair this with the existing Central Perk set to capture the whole Friends collection. At the same time, if you want something a little smaller than this set, both apartments feature lift-out carpets to create smaller models.
The Lego Friends Apartments set hits shelves, it’ll go for a cool $150 on the Lego website. If the Central Perk crew isn’t for you, our Christmas Lego guide has a bunch of other options. You could also check out the latest Mario Lego set, the Winnie the Pooh set or a Nintendo Entertainment System. If you’d rather just look, you can check out the record-breaking Lord of the Rings build, which features 150 million pieces. That sounds really expensive.
The products discussed here were independently chosen by our editors. GameSpot may get a share of the revenue if you buy anything featured on our site.
The third season of Mayans MC has come to a close with a massive cliffhanger that’s sure to send shockwaves through the show’s universe. Thankfully, Mayans MC will continue into Season 4, promising at least some closure about what just unfolded. For those who can’t wait that long, though, GameSpot spoke to showrunner Elgin James about the message the Season 3 finale was sending and what fans can expect in Season 4.
The following contains spoilers for the Season 3 finale of Mayans MC, “Chapter the Last, Nothing More to Write.” If you haven’t watched this episode yet, turn away now because we’re going to break it all down.
So much of Season 3 has seen EZ (JD Pardo) striving to be a good man and even, at times, leaving the MC life behind for a peaceful existence with Gaby (Sulem Calderon). Ultimately, though, Felipe (Edward James Olmos) advises Gaby to leave town without him, realizing that EZ is already lost to the violent lifestyle–something EZ himself finally accepts by the episode’s end. As it turns out, though, that journey almost didn’t happen.
“There was sort of a push to have EZ fully formed, to come back and maybe he’s a VP of the club or something in a position of power,” James explained. “We’ve never done EZ right, I didn’t believe.”
In previous seasons, EZ’s genius-level intellect has shown him to have a nearly photographic memory and also be a much-needed source of ideas for the club. He found himself in bad situations as he earned his way into the club, a place he wanted to belong. Less prevalent, though, was the natural inclination for the darker side of MC life that EZ leaned toward–something James personally identifies with.
“I know what it’s like for me. In my life, I have such an incapacity for joy that even when I start to feel it start to bubble up a little bit, there’s all these things where I just don’t allow it because of the things that I’ve done and the people that I’ve lost and everything else,” he said. “And that’s what I wanted to explore.”
And by the end of Season 3, after accepting that outlaw life is what he was always destined for, he’s standing alone, ready to protect his club from an invading force, regardless of what it will cost him. According to James, this next evolution of EZ–one who embraces the darkness in his life–is what fans should get ready to see in Season 4.
“I know he’s kind of seemed he’s got a foot in each world for the last three seasons now,” he said. “[In] Season 4, he’s going to plant his feet both firmly into this other world… [I] can’t wait to see what that looks like.”
Beyond that, though, this new turn for EZ isn’t going to be a subtle one, which might be surprising given how quiet and reserved of a character he can be. “I think that’s what we’ve always talked about where EZ’s always been trying to escape this darkness,” James said. “He’s already so introverted. He’s so internal and JD [Pardo] so smart and so internal, that it’s gonna be really exciting just to watch that explode.”
When it does explode, good luck to anyone in the blast zone. The fourth season of Mayans MC will most likely premiere in 2022.
Click To Unmute
Size:
Want us to remember this setting for all your devices?
The Season of the Splicer brings a new customization system to Destiny 2: transmogrification. The system allows you to change armor pieces to look like other armor pieces, giving you a greater degree of cosmetic control of how your Guardian looks. But the transmogrification system, called Armor Synthesis, is a pretty dense and confusing one. It requires you to gather and use new kinds of currency to buy new bounties and centers on Ada-1 in the Tower.
Working through the Armor Synthesis system requires you to work through a story quest, then take on new bounties to earn something called Synthweave. But how you get Synthweave requires a bit of work. Here’s everything you need to know about Armor Synthesis so you can start transmogrifying your armor and customizing your look.
Complete The Armor Synthesis Mission
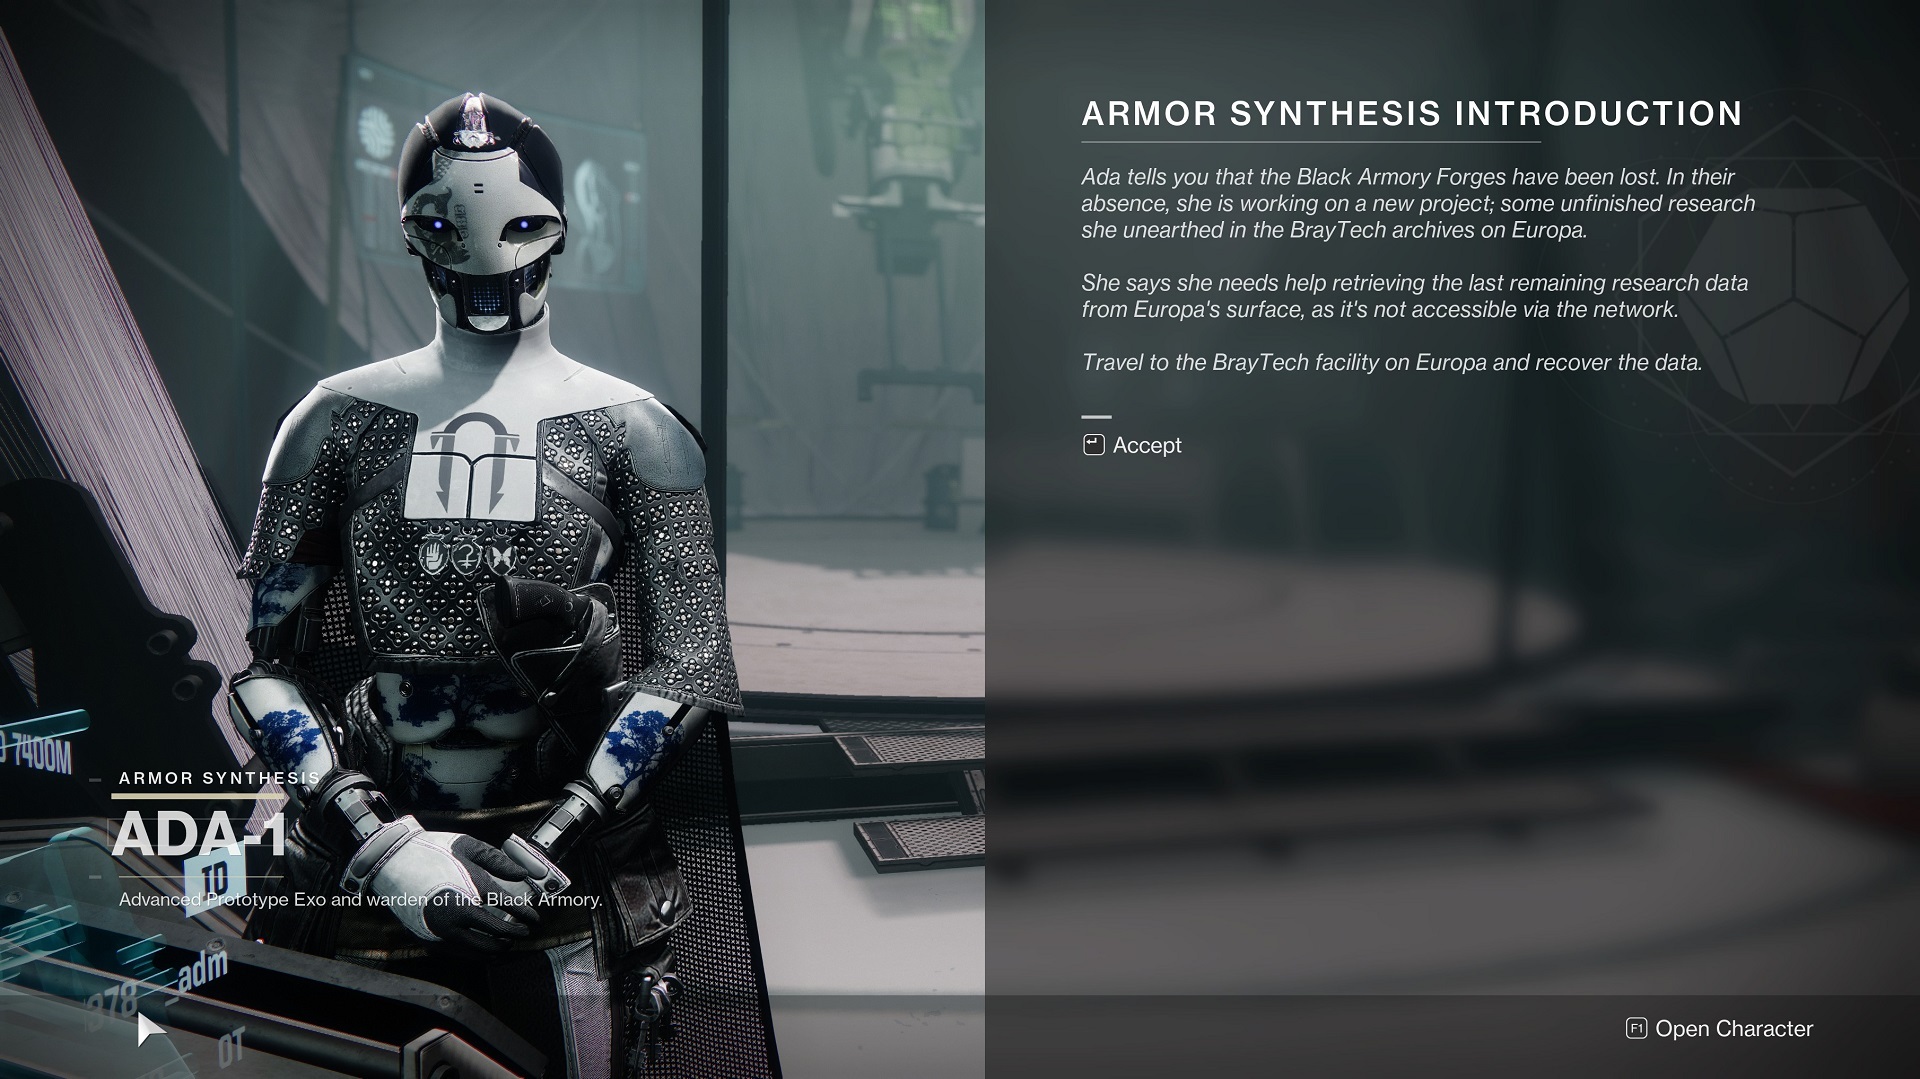
Talk to Ada about the way she’s reworked the Black Armory and help her complete the Loom.
To get access to the Armor Synthesis system, you need to head to Banshee-44 in the Tower and pick up a story mission to complete. That’ll direct you to meet with Ada-1, a major character during the Season of the Forge last year. Ada dispatches you to Europa to gather some key pieces of equipment from the Braytech facility there. This is easy enough to find–head to the Braytech Exoscience in Cadmus Ridge and head into the first big room of the facility and follow Ada’s instructions to get the data and equipment you need.
You’ll need key pieces from Braytech Exoscience on Europa to complete Ada’s project.
With those items in-hand, return to Ada-1 in the Tower and you can finish her new item, the Loom. This thing is key to transmogrification, as Ada explains.
New Appearance Customization Interface
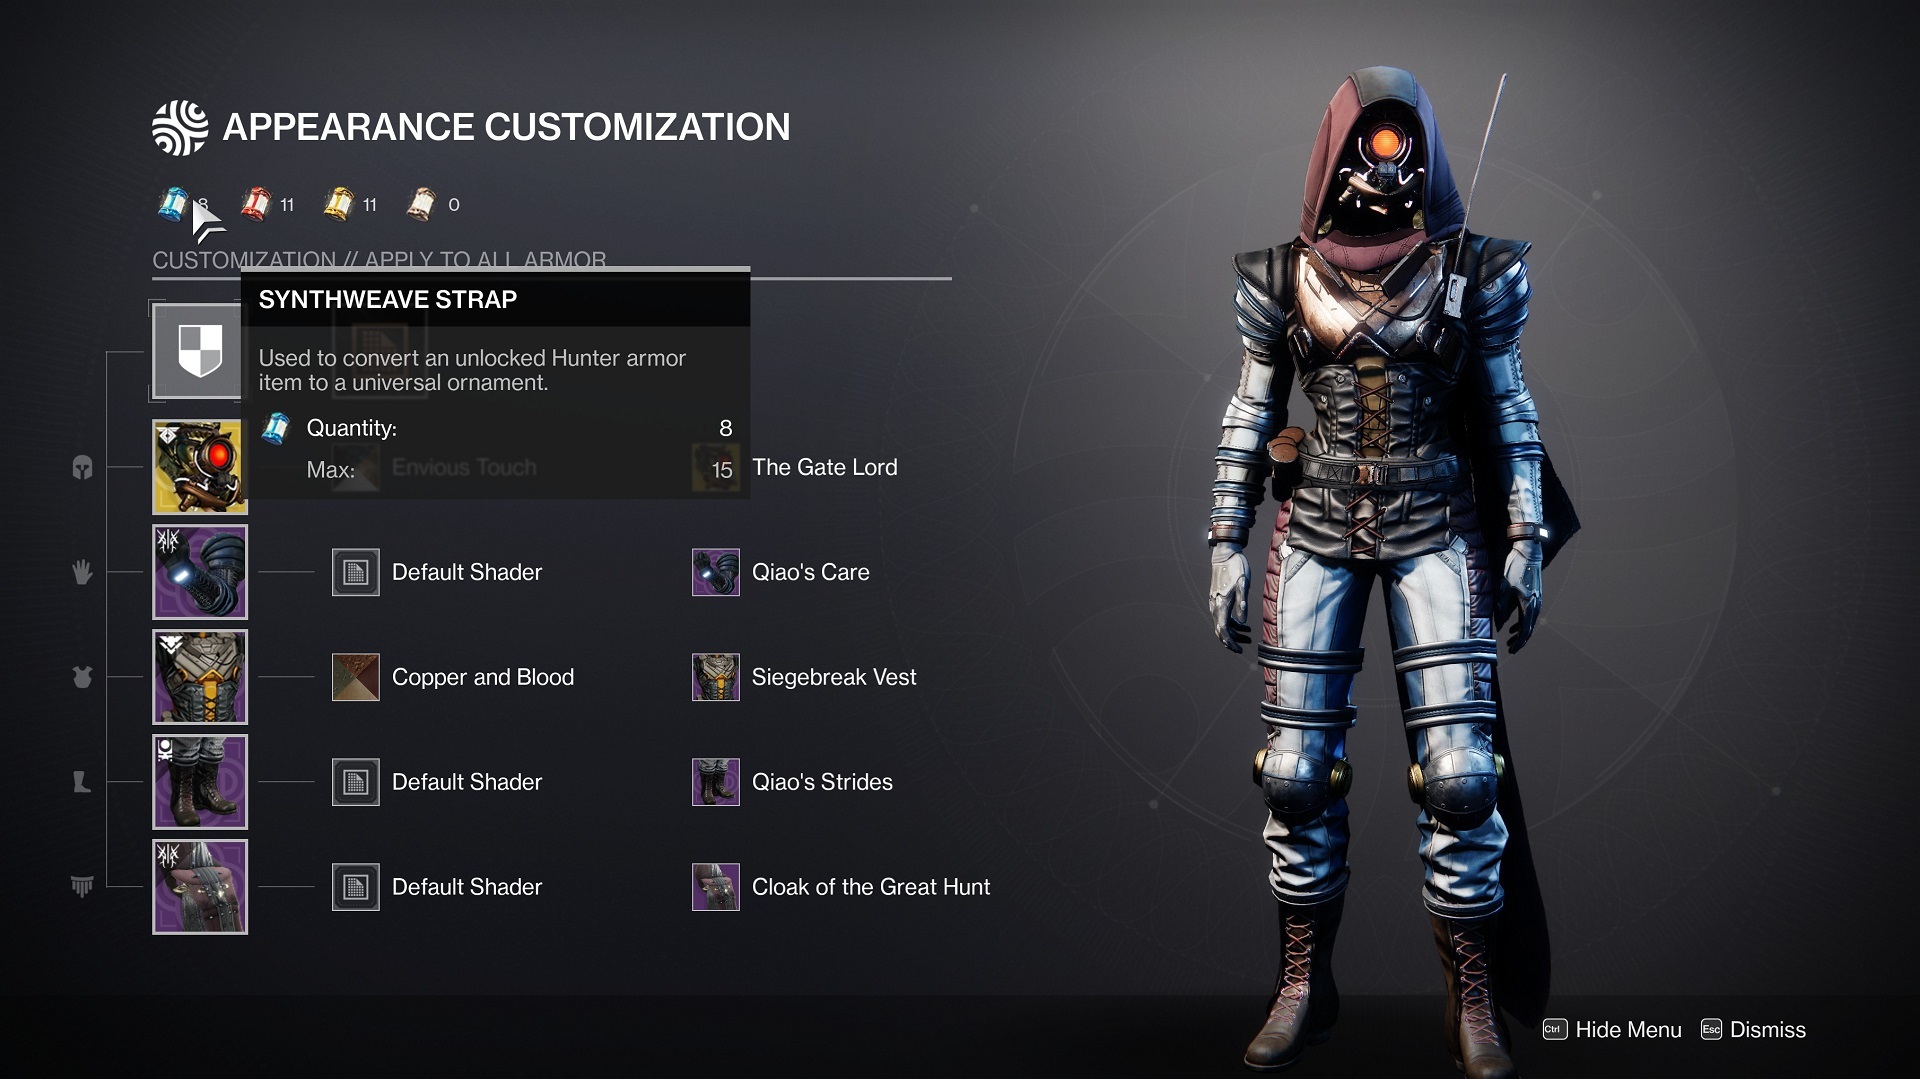
Next, you’ll get a quick walkthrough of the new Appearance Customization interface, accessed from the Character menu screen. On the customization interface, you can select any piece of armor and apply both shaders and Universal Ornaments. Those ornaments are what allow you to change the look of a piece of armor–essentially, applying the ornament makes the armor piece change its appearance to another armor piece. The thing is, when you first access Armor Synthesis, the only Universal Ornaments you’ll have are the ones you’ve purchased from the Eververse Store or earned from season passes. You can create ornaments from any other piece of armor stored in your Collections tab, but you’ll need that ornament using Ada’s Loom.
Ada gives you a sample of Synthweave so that you can create your first Universal Ornament; do that by just clicking on any ornament in the customization interface that has a lock icon on it, and follow the prompts to unlock it.
To get more Synthweave so you can make more ornaments, you’ll need to follow Ada’s steps. That’s where three new currencies and Ada’s bounties come in.
Synthstrand, Synthcord, And Synthweave
Once you’ve got the Loom built, you can get more Synthweave to create additional Universal Ornaments.
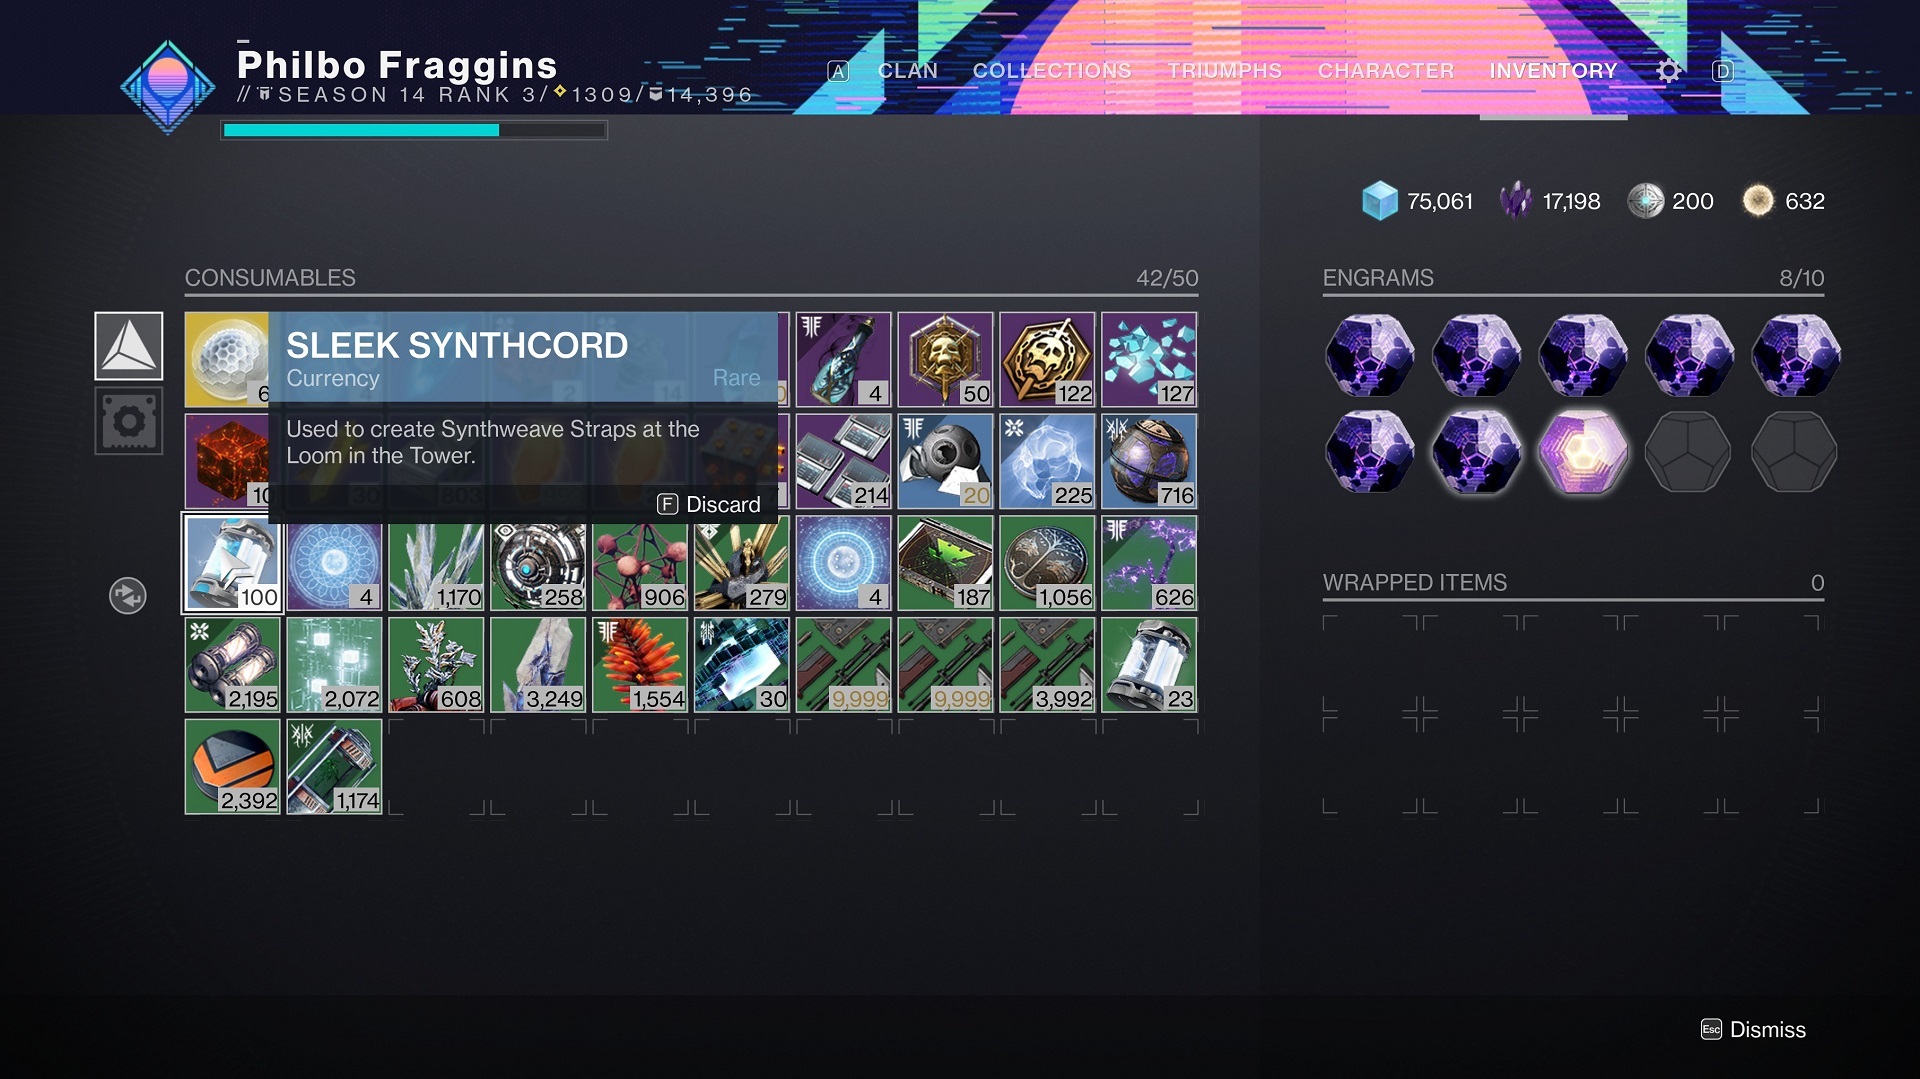
To get more Synthweave, you’ll need to engage in a pretty lengthy process. First, you need to earn a different currency called Synthstrand. This is a common item you’ll find in your character’s Inventory. Synthstrand is pretty easy to come by; enemies will drop it when they die and it seems like you’ll earn it for completing activities, so expect to pick up a fair amount of Synthstrand just for playing the game. Your goal is to grab 250 units of Synthstrand at a time.
When you have 250 Synthstrand, you can return to Ada and trade them for an Armor Synthesis bounty. These bounties apply to five different kinds of activity: Crucible, Gambit, Strikes, dungeons, and raids. They’re costly, so choose which one you want to do carefully. We haven’t investigated the other types of Armor Synthesis bounties, but found our first, the Strike bounty, to require a fair amount of time to complete. It required earning a total of 200,000 points in Nightfall strikes, which worked out to be three total Nightfall runs on Heroic difficulty (since that one carries matchmaking).
Synthstrand is used to buy bounties from Ada; completing them gets you Synthcord; and the Loom turns Synthcord into Synthweave.
Completing an Armor Synthesis bounty awards you Synthcord, your second new currency. Our Strike bounty awarded 100 Synthcord, and we aren’t sure yet if you’ll earn more Synthcord for taking on bounties from raids or dungeons, which seem like tougher activities.
When you have 100 Synthcord, you can take it to the Loom and convert it into a Synthweave–good to unlock one Universal Ornament. So the rate of exchange seems to be roughly one bounty for one piece of armor.
There are some caveats to the system, however. You can only buy 10 Armor Synthesis bounties from Ada-1 per season, per character class–which means you can only create 10 Universal Ornaments for each of your characters in a season. What’s more, when you complete an Armor Synthesis bounty, the Synthcord you’re awarded is specific to the class of the character you completed the bounty with. Thus you can’t earn Synthweave with your Hunter but spend it on Warlock Universal Ornaments–the Synthweave is specific to the character with which you earned it.
There is a universal version of Synthweave that’s not tied to a specific character, called a Synthweave Template. This is the brand of Synthweave you can purchase from the Eververse Store for Silver, Destiny 2’s premium currency. A single Synthweave Template will run you 300 Silver, while 5 Synthweave Templates costs 1,000 Silver.
Synthweave you earn through gameplay is tied to the character class that earned it, but you can purchase Synthweave that works for any character in the Eververse Store.
In general, 100 Silver is equivalent to one US dollar (although the more Silver you buy in a single transaction, the more “bonus” Silver you get, reducing the cost a bit). Therefore, a single Synthweave Template will cost you about $3, while buying five Templates brings the cost down to $2 each.
Efficient Synthweave
Generally, it seems like the best way to get Synthweave easily and without having to pay for it is to just play the game at your own pace and keep an eye on your Synthstrand numbers. Any time you hit 250 Synthstrand, you should head to Ada immediately and get a new Armor Synthesis bounty, keyed to whatever activity you plan to be playing in the near future. That way, you can earn Synthweave as you’re otherwise playing the game–if you try to grind, it seems like the Armor Synthesis system will become a real pain very quickly. But if you acquire it as you’re playing normally, it’s a much more easygoing system.
The caveat to that is making sure you earn all possible Synthweave you can on all three characters, should you have them. You’ll need to complete 10 Armor Synthesis bounties on each character for a total of 30 bounties. We’re still investigating what those bounties are like, but that seems a bit time-consuming. When we have more information, we’ll update this guide with insight as to which brand of Armor Synthesis bounty is the most efficient way to quickly earn Synthweave.
Note: This guide is full of spoilers for Resident Evil Village. Read on at your own risk!
Like any Resident Evil game, Resident Evil Village is filled with monstrous bosses, most of whom used to be people. What’s different about this game as opposed to many of the others is that the bosses here often require different approaches to deal with them. While you’ll usually have to unload with whatever guns you have, you also have various things to keep in mind, like the environment, weak points, and puzzle elements that you might not expect when you first show up.
We’ve run through Resident Evil Village a few times now, and have gotten a sense of how to deal with all the ugly horrors it throws your way. Whether it’s the vampires of Castle Dimitrescu or the abominations of Heisenberg’s Factory, every monster in Village has a way to bring it down. Below you’ll find a complete guide to everything you should know about every boss fight in Resident Evil Village, from preferred weapons, to boss attack patterns, to their various weaknesses.
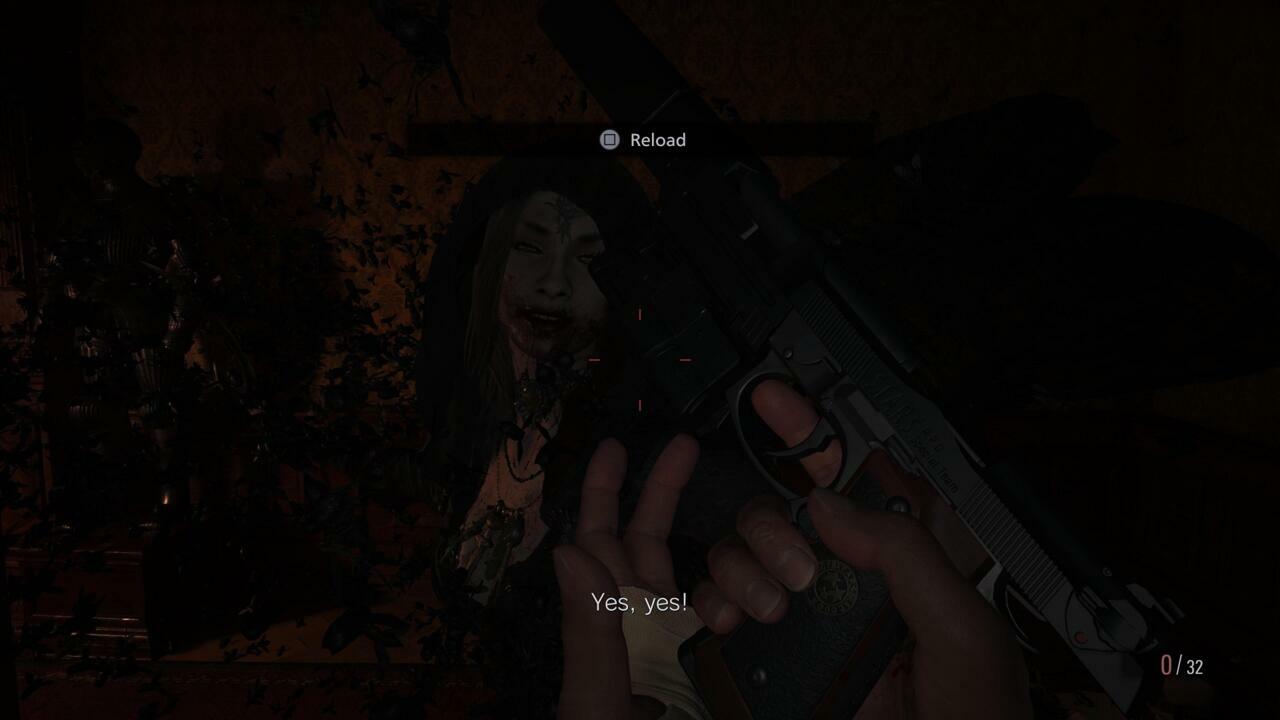
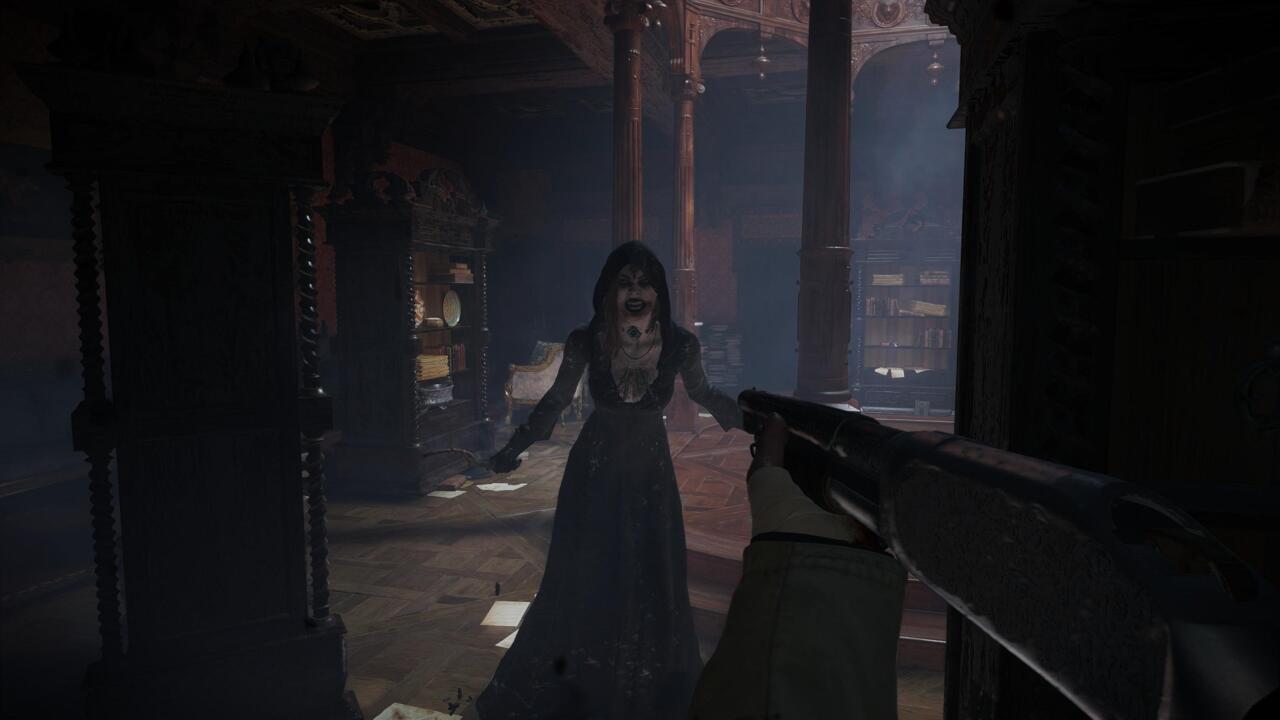
When you first encounter Lady Dimitrescu’s daughters, you’ll need to flee from them. This is tough the second time you encounter Daniela Dimitrescu, who will find you as you’re navigating through the dungeon. The daughters can turn into swarms of bugs and pass through barriers such as prison bars, which means she can close the distance on you and rip into your throat pretty easily.
In the dungeon, you’re going to have to run. Use a shotgun blast to scatter Daniela so she can’t close in on you as she passes through the dungeon bars, or you’ll take a hit. Run to the right to get around the barrier, blast her again if she reforms in your way, and make your way up the stairs and into the kitchen to trigger a cutscene.
You’ll now have a clear way to defeat the bug ladies–the cold. You want to maximize Daniela’s time in the cold, which can be tough in this fight, though, as just because she’s corporeal doesn’t mean she’s not still agile. The good news is that you can break the second window in the room, to the right of the first, to give her fewer places to hide. Keep her at bay with the shotgun until you can knock out the second pane of glass. From there, just keep laying into her with your guns while keeping your distance. It shouldn’t take much to bring her down if you’ve got her constantly blasted with cold air.
Lady Dimitrescu In The Dungeon
After Lady Dimitrescu pounds you through the floor, you’ll escape briefly before running into her again. She’s invulnerable to your weapons (not that you’ll have use of them anyway), so this is a quick game of keep-away.
After you’re attacked the first time, run to the back of the area and get a sense of the layout. You just need to dodge Lady Dimitrescu, either by kiting her down one hallway and using the other one, or by running circles around debris. It’s a good idea to get her to slice through the bars in the first hallway to get them out of the way for later.
Draw Lady Dimitrescu toward the far end of the room, then run back to the switch and activate it to start opening the doors. You’ll then have to dodge her again, so draw her back to the far end of the room, then make a break for the door. She’ll finally cut her way through the bars down the hall ahead of you, so you’ll have to backtrack and run back through the door you just opened. Draw her toward the switch, then make for the hole she just cut in the bars and dash to the exit. Grab the mask off the statue to escape the area.
Bela Dimitrescu, The Second Daughter
You’ll run into Bela eventually when you return to the second floor of the main hall, near the Wine Room. She’ll force you toward the Armory using the Iron Insignia Key, so just run for it. You’ll need to push through a wood barricade and take the face off a statue as you approach to open a tunnel into the Armory.
Once you’re in this room, Bela will corner you without a lot of room to maneuver. First, scatter her with a shotgun blast, then run to the wall opposite the door and slide the shelf out of the way. You’ll reveal a crack in the wall here, but you’ll need an explosive to blow it open. If you’ve got a pipe bomb, it’ll do the trick; if not, there are three on the back table. Just be careful to keep Bela from getting close to you as you’re readying your explosive to avoid letting her get in close to go for your jugular.
The pipe bomb explosion will blow open the hole in the wall, letting in cold air. At that point, just let loose with your weapons while trying to keep debris and stuff between you and Bela. Hammer her with the shotgun to finish her off.
Cassandra Dimitrescu, The Third Daughter
The Iron Insignia Key will get you into the Library, attached to the Opera House, where you’ll face the last of the Dimitrescu daughters. Unlike the other locations, you can’t just blow out a window or a hole in the wall to let cold air into the Library; instead, you have to throw a switch on one of the columns ringing the room, which opens the skylight. However, the skylight won’t stay open permanently, so once you find the lever, stick near it and let Cassandra come to you, rather than chasing her around the room so you can keep the cold air flowing constantly.
Exposing Cassandra to the cold knocks down her danger level quite a bit, but she’s a little more cautious than her sisters, using the bookshelves around the library for cover to make it tougher to bring her down. She’ll also try to use them to get in close to you. Hit her with whatever you can but focus on keeping the cold coming in, as that’ll make it a lot tougher for her to attack you. Stay back, do your damage, and keep throwing the switch to finish her off.
Mutated Lady Dimitrescu
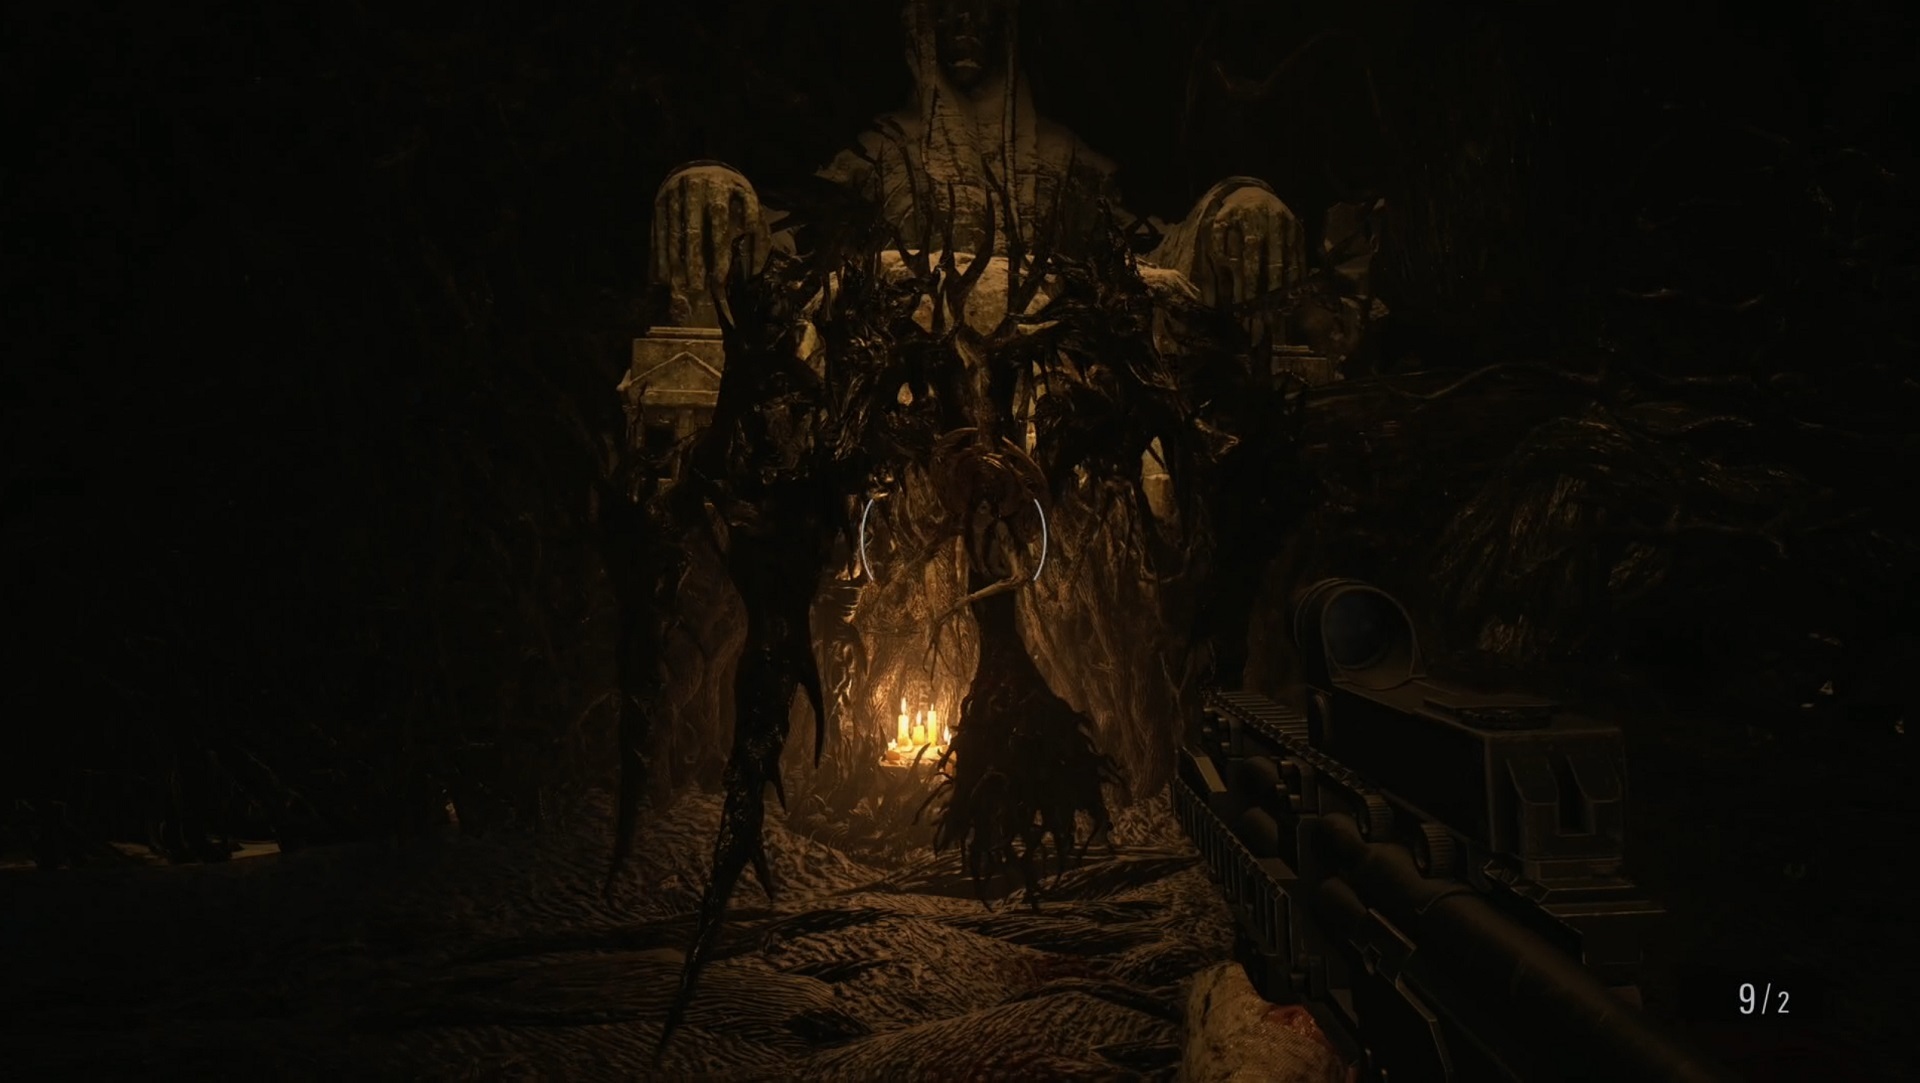
The mutated form of Lady Dimitrescu is a frightening one, but this is a fight that’s ultimately not too hard to handle, provided you’re quick on your feet. You’ve got a little space to work with as you run around the spire where you fight the boss, and while her dragon-like mutant form is enormous, it can’t maneuver well.
The trick here is to use the corners to keep clear of the mouth and claws of Lady Dimitrescu, while landing shots on the still-human body sticking out of the dragon’s back. You can do that by retreating to the corner and waiting for her to approach, then blasting away and retreating again. Keep out of the central, covered area, though–Dimitrescu can charge through the walls and smash into you, so it’s not a great place to be. That’s also why you should keep moving in circles and around corners. She can charge at you fast, but only in a straight line, so forcing her to turn around the corners will keep you relatively safe. As she approaches, land your shots, then spin around and put some distance between you before repeating the process.
Once you’ve punished Dimitrescu enough, she’ll take to the sky, and this is where you want to pull out the sniper rifle. Zoom in as much as you need to and land a few shots on her human-ish body while she’s hovering. You want to hit her once or twice every time she flies out, or you’ll risk giving her an opportunity to swoop in and slash at you. She’ll also send swarms of insects at you the same way her daughters did, so when that happens, get moving to try to stay clear of the cloud.
Listen carefully and keep your eyes open to try to track Dimitrescu, as she’ll circle the tower and try to lose you while she’s flying. She’ll also likely swoop back in for another round of chasing you around the tower, depending on your difficulty. Keep moving to minimize the damage she can do to you, but don’t give her the opportunity to charge, as it’ll knock you down and make it tough to recover.
After she’s taken enough damage, you’ll move higher up to a staircase. When you get control back, sprint up to the top and quickly open the boxes for more ammo. Watch Dimitrescu, as she’ll circle the tower a couple times, then take your shots when she stops. Try to hit her quickly at least once to stagger her out of sending more bugs your way. Enough led and you’ll trigger a last cutscene and the opportunity to put her down for good.
Angie and Donna Beneviento
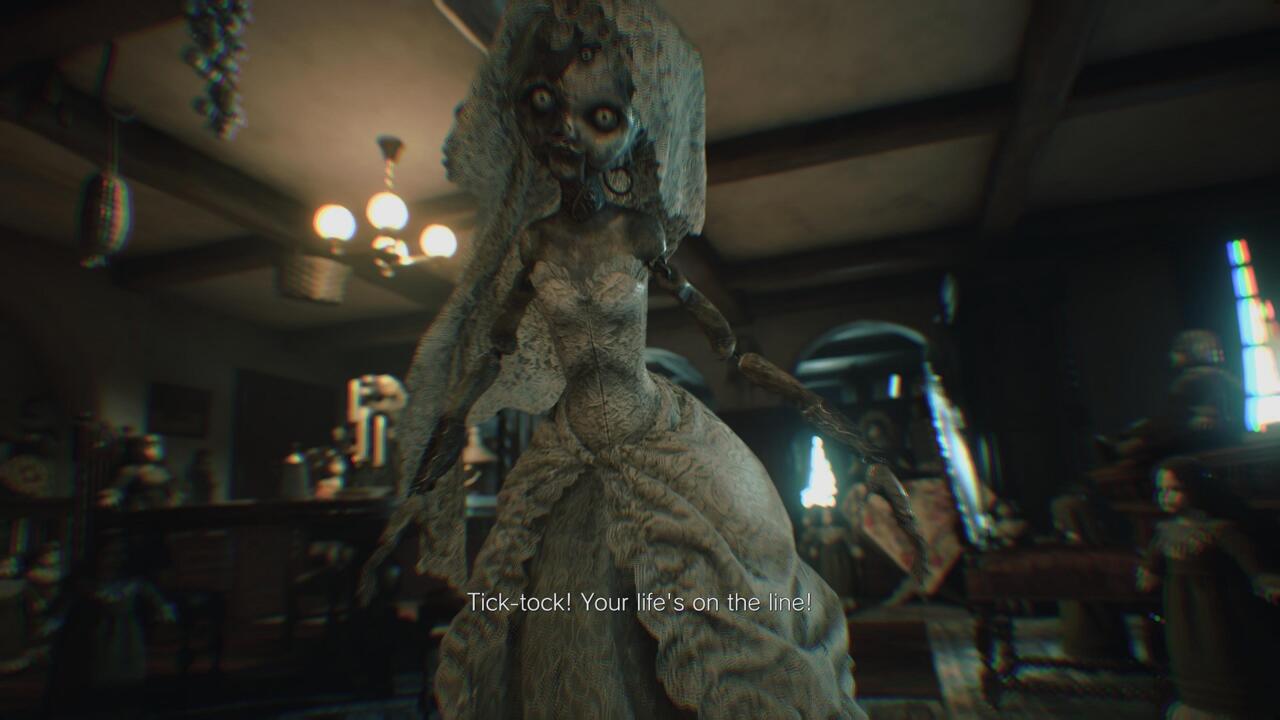
Fighting the dollmaker Beneviento is wholly different from the other boss fights in the game. You don’t have your weapons here, and instead, your taking part in a lethal game of hide-and-go-seek. Your goal is to locate Angie, the little doll in the wedding dress, wherever she is in the house. The longer you take, though, the more the other dolls will twitch and laugh, until finally, a group of them will attack you with their knives, dealing significant damage.
The good news is that you can beat Angie at lightning speed if you’re quick about it. First off, this is a good place for headphones; if you can zero in on the sound of Angie’s laughter (as opposed to the other dolls), you can find her more quickly. She usually shows up in three specific spots, but there is a chance she can wind up in different ones, so you’ll have to be on your toes here to find her quickly.
When you do locate Angie, just pick her up to trigger a brief cutscene, reset the timer, and move her to a new place. As you do damage, look for blood on the walls that can give you clues as to where she’s headed. Here are the three locations where you’re likely to find her:
Location 1: Upstairs in the child’s room, the only room you can access on the second story. Look for her on the ground to the left of the bed; you can also check in the closet here if she’s not out in the open.
Location 2: Back down in the room where the boss fight first kicked off. Go past the dining room table to the living room area with the couch and look for Angie to the left as you step down.
Location 3: Run down the narrow hallway toward the elevator that took you down from this section of the house initially. She’s usually right on the floor beside it. This is where blood trails will be especially helpful; if you see smears on the walls, you’re going the right way.
Stab Angie three times and you’ll find you’ve actually eliminated Donna, not the doll. That’s because throughout this entire area, Beneviento has been infecting you with hallucinations. With the boss dead, you’ll finally see things clearly.
Moreau
The first phase of the Moreau boss fight, before you’ve drained the reservoir, is about avoidance. Watch for the big fish to rise out of the water and barrel toward you. Most of the time when you want to cross a floating bridge or similar structure, Moreau will rush it in an attempt to knock you into the water and kill you. Therefore, you want to bait him a bit–walk toward the place you intend to cross the water, wait for him to swim toward it, and then back up and let him pass. You move especially slowly when crossing these floating bridges, so for the ones where you have a lot of ground to cover, make sure you let Moreau miss you before you start your trip.
Draining the reservoir triggers the boss fight proper, where you’ll follow Moreau to the drowned portion of the village and battle him up close. First, bring plenty of explosives to this fight; it’s a good idea to craft additional grenade launcher ammo if you can, as well as shotgun ammo. The big fish will stomp forward in an attempt to trample you up close, but explosives are great for staggering it. When that happens, unload with the shotgun into the man-shaped tongue that spills out of its face, then get some distance and prepare another volley.
Up close, Moreau will try to wallop you with his big head, but you can block those attacks with your guard. That’s not an ideal solution, but you might find that you have to, since Moreau will use his green goop to create barriers and cut off pathways for you to maneuver in this arena. If you see that happening, unload on the barrier to take it out, since getting backed into a corner here is extremely dangerous.
Once you hurt Moreau enough, he’ll climb up onto the rooftops and puke acid into the sky, creating a deadly rain. When you see him start climbing, run directly for the nearest roof and take cover. You should find extra ammo in these spots as well, and they’re marked in yellow to be very obvious, but watch for their locations as you’re fighting so you know where to retreat to. Moreau’s acid is extremely deadly–much more so than his up-close attacks–and while the rain won’t kill you immediately, it will do you in pretty fast if you’re not under cover.
Moreau will start plowing through buildings after you’ve hurt him enough to trigger his first dose of acid, opening up more of the arena. He’ll eventually open up three different sections, and throughout, you’ll find explosive barrels. Use these to your advantage to save grenade launcher ammo, as they’re very effective. You’ll have to lure him toward them, though, so make sure you note their locations and you move quickly to get into position so you can avoid his attacks.
As with the other bosses, repeat the process of avoiding Moreau’s acid and dishing out punishment and he’ll go belly-up.
Sturm
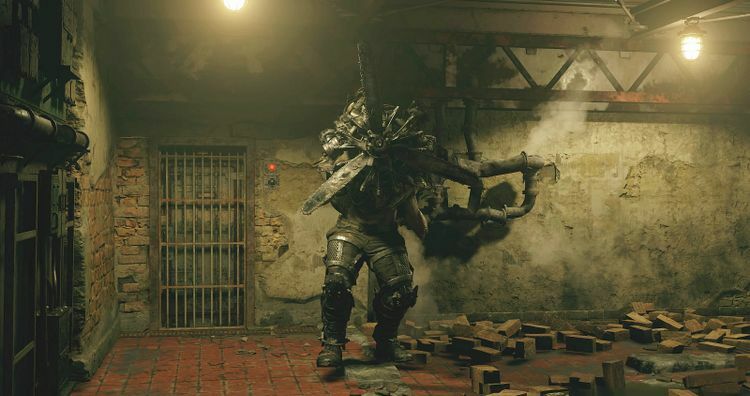
Heisenberg’s creation, which is a big guy with a damn propeller for a face, will chase you throughout the Factory area, but eventually you’ll face him in a tight room full of hallways. This is tough to deal with at first, because he’s tough to see coming, but he will charge straight at you and plow through walls to take you down. The good news is that he’s not especially bright; he mostly just runs in a straight line, following you through one or two charges before careening into a wall. Your goal at first, then, is to try to pinpoint his location, dodge him as best you can, and get him to open up the space a bit. Bring healing items.
Once Sturm has wrecked a few of the walls in this room, you’ll have a better chance at seeing him, avoiding him, and damaging him. Watch for the boss to charge toward you and dodge out of the way, then do so again until he slams into a wall; quickly wheel around and shoot the glowing red exhaust port in his back to do some damage. After that, Sturm will charge up and release a flame blast in your direction; it’s best to try to get behind a wall or other cover when this comes your way. Some of the walls in this room are metal, which he can’t break, so use those to avoid the fire.
Sturm leaves some flames on the ground, so you’ll need to pick a path around the burning floor to avoid taking damage. As soon as he’s done with his flame burst, get ready to run again, because he’s coming for you. There’s ammo scattered around the edges of the room and sitting on pipes, so grab some if you need it. Mines are also handy here because Sturm will run straight into them without much coaxing. Above all, though, try to keep an eye on the boss so you can run away from his charges and lose him into walls so he won’t run you over.
You pretty much just have to repeat this process until the fight is done, focusing on hitting Sturm in the back whenever he’s facing away from you. Try to be quick about zeroing your shots because he won’t leave the weak point exposed for long. Once he takes enough damage, he’ll explode, leaving you free to exit the Factory.
Heisenberg
This is actually probably the easiest fight in the game thanks to the toy you get to bring into it: Heisenberg’s tank. On the elevator ride up, take a second to familiarize yourself with the vehicle. It can block incoming attacks with a guard of its own, which defends you with a chainsaw, and has tank rounds that take a second to recharge between shots, as well as a machine gun. Try to keep the machine gun firing constantly until you can let loose with the tank round, and if Heisenberg closes the gap on you, get that chainsaw in front of your face to keep his attacks back.
The tank is actually a bit more agile and maneuverable than Ethan is on foot, what you want to do here is strafe sideways to keep away from Heisenberg’s attacks and charges, while continually laying into him with machine gun fire and explosive rounds. You should be able to keep mostly clear of his attacks early in the fight.
You’ll see some glowing red spots on his chest, on the crane arm with the saw on it he uses to attack you, and on lower sections of his main body. Target those with whatever you’re shooting at him. Occasionally, he’ll draw chunks of metal to him to act as a shield, but he’ll leave a hole over one of the weak points so you can wail on him and force him to drop his guard. Hitting any one spot with enough fired will stagger him, but you’ll need to damage all four to hurt him enough to push him into a new phase of the fight.
Hurt Heisenberg enough and he’ll knock you off your tank, forcing you to fight him on foot. He’ll drop several chunks of metal onto the battlefield, which you can use as cover as you run around. The goal is still the same, though–hit him with whatever you can in the weak points, making use of your strongest weapons. You can also guard against his attacks, but you’re going to take more damage.
The good news is that you don’t have to hit Heisenberg especially hard to end this phase, so prioritize keeping yourself alive and shoot at him when you can. There’s more ammo and other pickups around the battlefield to help you fill up ammo if you need to. After you damage him a little more, a cutscene will take you back to the tank, where you’re free to finish Heisenberg off.
Mother Miranda
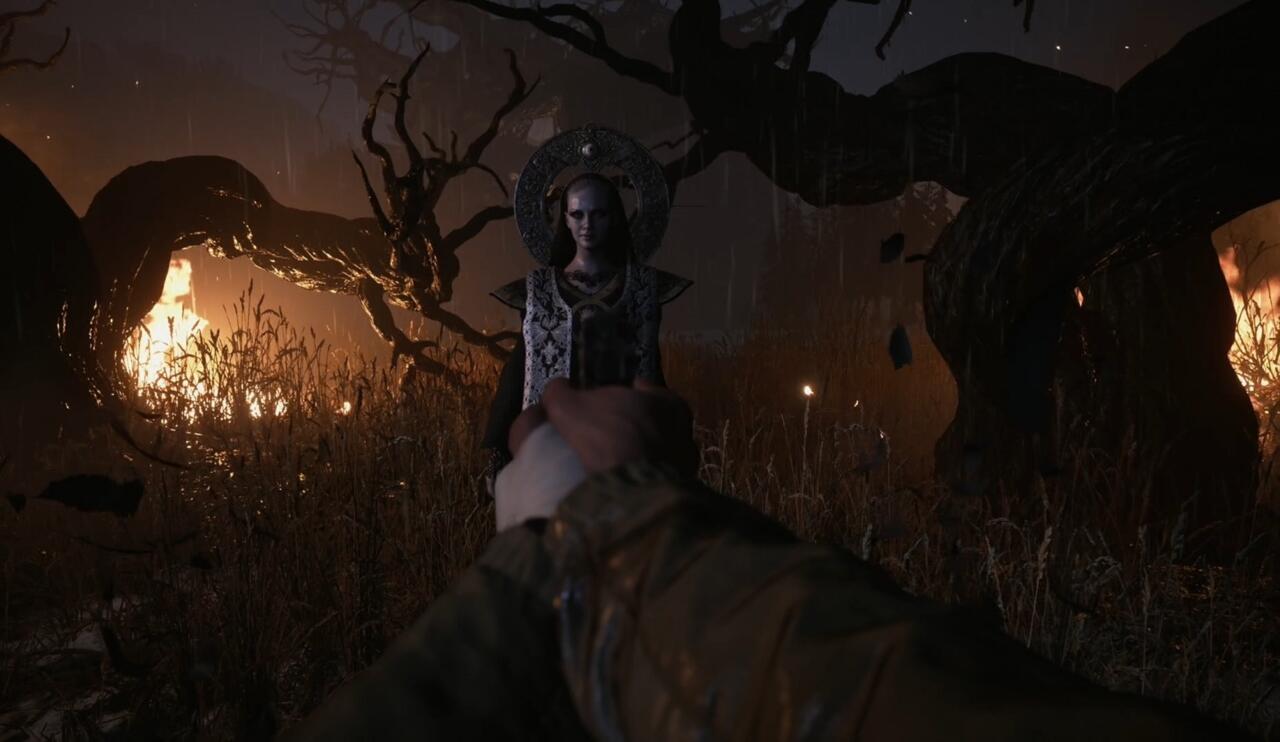
This fight is a tough one because Miranda has a variety of attacks and takes a huge amount of ammo to put down for good. Primarily, you want to keep moving to avoid as much damage from the boss as you can. She mostly will attack in straight lines and attempt to drop on you in specific places, so if you run around the edges of the arena, you can avoid a lot of damage from her. That’s a good idea, because you need to outlast this boss, and this fight is going to take a while.
In her first phase, Miranda just comes at you with her claws. She’ll start toward the center of the arena and rush forward, but she attacks in a straight line, so you’ll have time to dodge sideways and then wail on her from the side. Hit her hard with weapons like your shotgun, doing as much damage as you can. Try to get a sense of the timing of her moves before firing too much, though, because conserving ammo in this fight is a very good idea, and missed shots are costly.
Blast Miranda during her melee strikes and watch out for her to call pillars of mold up from the ground. When that happens, dart behind one, staying close to the edge of the arena. Between the pillars, a big golden ball of mold goo will appear, spraying orange blasts off in all directions, but the pillar will provide cover to keep you from taking any damage from it. Keep this in mind, though: when you see that gold ball and there’s no cover, shoot it to destroy it.
Be careful of Miranda’s attacks after the ball goes away, as she’ll cut right through the mold to come after you. This is good, actually; if you can bait her through the mold, she’ll create ammo drops you can pick up. Keep hammering her with your guns until she takes enough damage to go into her second form, where she gains big spider legs.
Miranda now gets more powerful attacks and more agility. She’ll still come straight at you, swinging away with multiple strikes, but you can still dodge them by high-tailing it around the edges of the arena. Be especially wary of the final attack in her melee combo, because she can now pivot to hit you with it even if you dodge a little to one side of her initial strikes; she’s not stuck going in a straight line anymore. The good news is that this will bring her close to you when she finishes an attack pattern so you can whirl around and shoot her a couple times before she withdraws. Keep moving to dodge these attacks and watch for her to jump up on the standing stones on the sides of the arena. When she does that, take a shot at her if you have it, but make a point to run for it–she’s about to leap off the stone and land right wherever you’re standing.
In the third portion of the fight, Miranda takes flight, and again, you’ll need to do some dodging. She’ll now swoop down through the air to nail you, and she’ll repeat that a couple of times, so keep running to stay clear. When she stops, take a shot with the sniper rifle. Watch for Miranda to over and summon three of those gold mold balls over her head. When that happens, shoot them down–if you have grenade launcher rounds, this is a swell time to use them, as you can nail Miranda for big damage and blow up all the orbs. If you leave them, they’ll flood you with those molten mold blasts, and there’s no good way of avoiding them, so even if you have to use handgun ammo, make sure to shoot them down.
When you’ve done enough damage to Miranda in the air, she’ll drop back to the ground and assume her first, terrestrial form–but this time, she’ll blind you in darkness. She’s still doing the same attacks as before, in a straight line, but this time you won’t see her coming and instead will have to listen for her. It’s tough, but try to stand your ground to spot her approach and land a shot before moving clear, because she disappears very quickly after finishing a combo and is tough to shoot afterward. You want to hit her a few times to make her cancel this whole darkness idea, at which point she’ll go back to one of her earlier forms.
In the final portion of the fight, Miranda will basically rotate through all her forms and attacks, so keep up the motion and use the strategies you employed earlier to deal with her. Prioritize hiding from or destroying the golden mold balls, as these are the attacks that are toughest to avoid, and try to keep up as much damage as you can. This part of the fight can drag quite a bit because it becomes tough to keep damaging Miranda, and you’re likely starting to get low on ammo. Hit her with whatever you’ve got, but if you can, keep crafting shotgun ammo, as it tends to be the most reliable way to hurt her with quick shots.
Finally, Miranda will come after you in a final strike and you’ll be prompted to fire away. Pull out whatever gun you’ve still got ammo for (hopefully the shotgun because a handgun makes this a bit tougher) and just unload. A few shots to her face will stagger her, and a few more will finally put her down.
Battlefield 4 is a first-person shooter which features a character-driven campaign that starts with the evacuation of American VIPs from Shanghai and follows your squad’s struggle to find its way home.